Microsoft Purview. I’m certain it’s features can seem a little overwhelming when first strolling through the documentation of the product. It sure was for me. In this blog series I want to give you insight in Microsoft’s product for managing data security, compliance and governance for the Microsoft 365 suite, Microsoft Purview.
This article acts as an overview of the features in Microsoft Purview, how they fit in the Microsoft 365 ecosystem and what feature can be used to reach a certain goal. Each feature (which is underlined) will be explained in a separate article, where I’ll use this overview to link to each of those articles.
First things first. Microsoft Purview is a unified solution that used to consist of 2 products: Azure Purview and Microsoft 365 Compliance solutions. In this blog series I’ll focus on the Microsoft 365 side of the product.
Overview – The big picture

Before I start explaining the different features that Microsoft Purview consists of, it’s good to know where all the tools take their place in the “big picture” aka the Purview landscape. To implement a data security, compliance and governance strategy you’ll have to walk through various steps.
- Know your data
First you’ll have to assess your data landscape. Where is your important data? Where is the data that poses possible privacy risks for example, and where is other sensitive data stored? These items have to be identified before you can continue to the next step. Often this step is executed by stakeholders that know their part of the data landscape well. The Purview solution can manage both cloud and hybrid environments. Want to know how your data environment matches up with current data privacy controls or standards? This is the place (or step) to be.
- Protect your data
Second, data that’s identified to be subject to data privacy regulation needs to be protected whether it is in the cloud or on-premise. Examples of these kinds of laws or regulatory controls in the Netherlands are NEN, ISO or BIO. This data (and of course other data you want) can be protected by applying labeling, which in turn makes it possible to apply an action based on the label your content has.
- Prevent data loss
To prevent data loss, risky behavior and accidental oversharing of sensitive information needs to be prevented.
- Govern your data
“Keep what you need and delete what you don’t” is a great tagline for data governing. Governing your data can be done by applying labels that make sure data isn’t being deleted if it’s supposed to be retained for a certain period or it can be deleted within a certain timeframe if it’s not meant to be retained for a certain period.
Tools of the trade
Now that we’re aware of the Purview landscape, let’s take a look at our “tools of the trade” and match them with each of the 4 categories above.
- Know your data
Knowing your data starts with a non-technical process to identify where your data is stored as mentioned above. When you have gathered information on the storage locations (Which can be in the Microsoft 365 cloud, different Azure components or on-premise by using an agent), you can:
- Run a risk assessment and obtain a compliance score by using the compliance manager. The compliance manager matches your environment with various pre-defined assessments to give you insight in how compliant you are in relation to certain regulatory controls like ISO or NEN and what you have to do to improve your posture. These assessments are made available by Microsoft, but of course you can also create your own.
- You can set up sensitive information types or custom sensitive information types to classify data in your environment in various ways. An example is the use of pattern matching by using regular expressions.
- Trainable classifiers are an advanced way to identify data. It does not use pattern matching, but you can feed it samples of your data. It will then use AI to train itself and get better at matching your content.
- Content Explorer can be used to view an overview of your items that have a sensitivity label, retention label or have been classified as a sensitive information type.
- Activity Explorer takes a look at your audit logs and uses this information to show what actions are being taken on your labeled content.
- Protect your data
Protecting your data can be done by:
- Applying Sensitivity Labels. These are labels that attach to your documents in clear text in the metadata of your files so they can be read by someone that might not have access to the content in the document. Actions that can be applied to labeled documents are “encrypt”, “mark content” or they can be used to protect content in containers like sites and groups. The Azure Information Protection Unified labeling client can be used to extend labeling to file explorer and powershell. To identify data on-premise, the Information Protection Scanner can be used. It will present information of your on-premise data in a unified view within the Microsoft Purview portal. Want to protect data residing in third party apps? Take a look at the Microsoft Information Protection SDK.
- Connecting on-premise Exchange, SharePoint or file-servers that run File Classification Infrastructure (FCI) for protection using Rights Management Connector.
- Implementing Office Message Encryption. This encrypts email messages (and attachments) so only authorized recipients can read the information.
- Implementing Teams and Sharepoint Access Controls. Use access controls in both Teams and Sharepoint to prevent oversharing of information.
- Setting up Sharepoint Information Rights Management (IRM) to protect checked out documents.
- Using Microsoft Defender for Cloud Apps to label sensitive information in cloud data stores.
- Extending your labeling needs to Microsoft Purview Data Map Assets. A few examples of these assets are Azure Data Lake, Azure Files, Azure SQL DB and Azure Cosmos DB.
- Prevent Data Loss
Microsoft Purview Data Loss Prevention (DLP) can be used to help unintentional sharing of sensitive items. These capabilities can be extended to:
- Browsers like Chrome and Firefox with browser extensions.
- Windows 10 endpoints by using Endpoint data loss prevention.
- Your on-premises file shares and Sharepoint Document Libraries with Microsoft Purview DLP on-premises repositories.
- Microsoft Teams chat and channel messages.
- Govern your Data
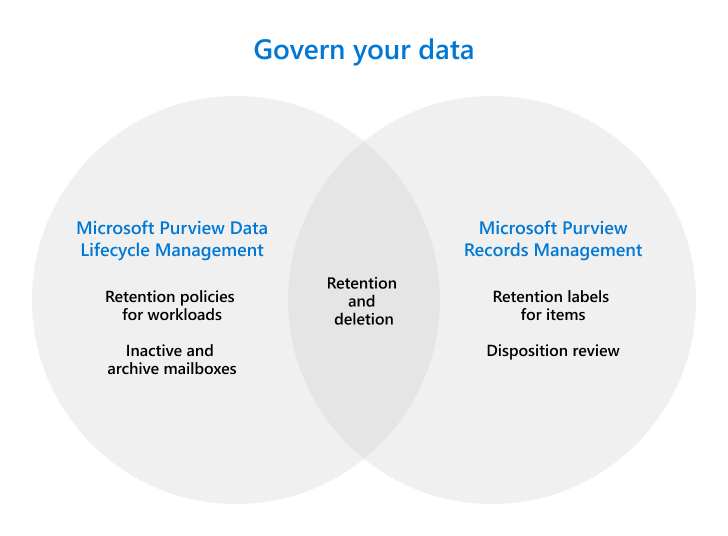
Governing your data within the Microsoft 365 ecosystem is done using 2 solutions. “Microsoft Purview Data Lifecycle Management” and “Microsoft Purview Records Management”. The following image shows the overlap in both solutions:
Remember that data governing was all about “keeping what you need and deleting what you don’t”? Here are your tools of the trade for this to happen:
Microsoft Purview Data Lifecycle Management
- Retention policies for Microsoft 365 workloads let you retain or delete content. This can be done for email, documents, Teams and Viva Engage messages.
- Inactive mailboxes lets you keep mailbox content after an employee leaves the organization.
- (Online) Archive mailboxes can be used to give users additional mailbox space.
- Import service for PST files. No explanation needed here.
Microsoft Purview Records Management
- A File plan can be used to bulk create retention labels or export information from existing labels. File plan descriptors support additional information for each label as metadata.
- Retention policies can be used to assign the same retention settings for content at a site or mailbox level, Retention labels can be assigned at item-level. See the first bullet under “Microsoft Purview Data Lifecycle Management” for more information.
- Event-driven retention gives you the capability to automatically implement labels and actions based on certain events.
- Disposition Review gives you the ability to manually review content before it’s permanently deleted. Proof of disposition of records is included.
5. Investigate (Bonus step)
After (all of) the above is in place, there are a few features to keep in mind:
- Auditing and alert policies combined with reporting can be used to keep being informed about your environment.
- Data subject requests (by for example regulatory bodies) can be met by the content search and eDiscovery features.
Are you still with me? Good. I reckon this is a large list of features that take some time to take in, but I hope the tools make more sense now that they’re categorized in the know, protect, prevent and govern categories.
As future posts about the above features come online, I will replace the underlined pieces of text with a link to that article.
