One of the core features of Microsoft Purview is Data Lifecycle Management (DLM), formerly known as Microsoft Information Governance. DLM is all about providing you with the tools you need to keep information that you need, and delete the information that you don’t. This process is of great importance for compliance with regulations, risk management en liability management.
Data Lifecycle Management in Microsoft Purview has a great overlap with Records Management, although they also have their differences. However this is something for another article. This article will explain how to configure the basics of Data Lifecycle Management, and will show you the end-user experience.
Terminology
Let’s start with some terminology:
- Retention Policies are applied to containers by DLM administrators. Examples of a container can be a SharePoint site, Microsoft 365 group, a team in Microsoft Teams or a mailbox in Exchange Online. All information within these containers will inherit the retention policy that is set at the container level. Note that retention policies are not visible to your end-users. The recommended approach here is that Retention Policies should be your foundational solution, where labels should be used to configure documents that are an exception to this rule.
- Labels are applied at the item level, such as Word, Excel or PowerPoint files within a container. They can be auto-applied (for example by using pattern matching) or manually applied by your end-users.
- Label Policies determine where labels are published. For example a SharePoint Site, Exchange Mailbox or OneDrive accounts.
Configuring Retention Policies
With the terminology out of the way, let’s dive in and configure a retention policy.
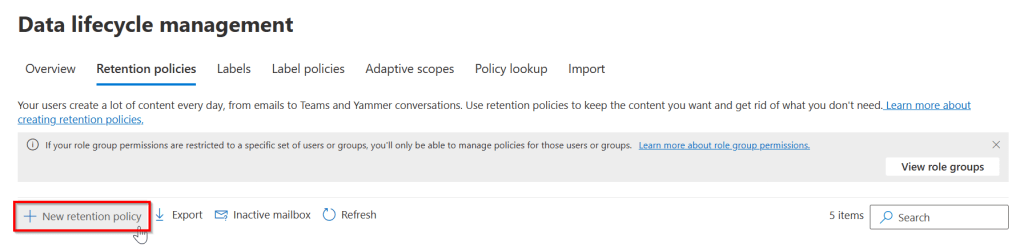
Navigate to the Microsoft Purview portal at https://compliance.microsoft.com and navigate to “Data Lifecycle Management” and “Microsoft 365”. Click “New Retention Policy”.

Give your retention policy a name that makes sense and is an explanation to what the retention policy will achieve. Also provide a description with the same thing in mind. In the next screen, admin units can be provided if you configured your environment to be divided in those units. Each unit can be managed by a specific set of administrators. However, his is beyond the scope of this article so we’ll go with the standard “Full Directory” admin unit.
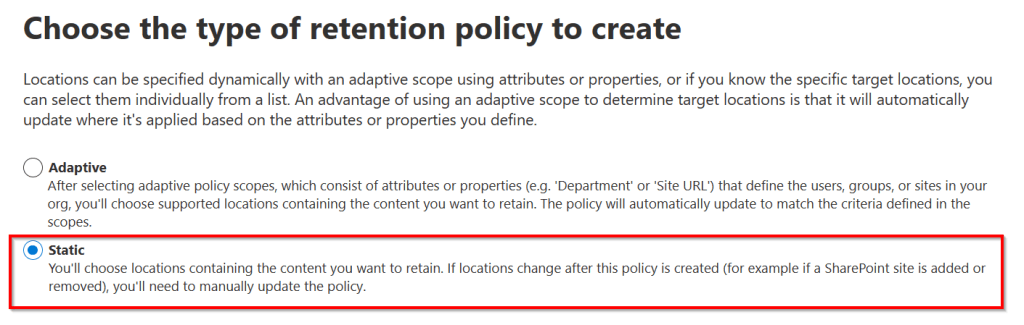
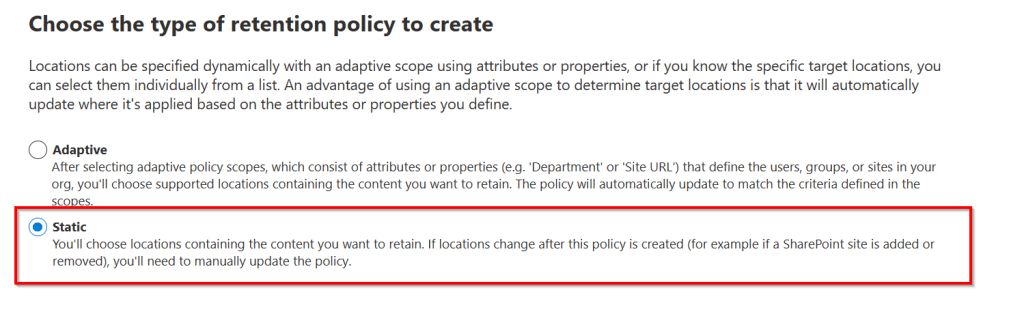
Next, we can choose the type of retention policy that should be created. An adaptive policy scope can be used to select locations containing the content you want to retain or delete in a dynamic way. When new locations are added that match the adaptive policy scope, they are automatically added. This is, in fact, the recommended way that Microsoft wants you to assign your retention policy. However, I would like to make clear how retention policies work before throwing in adaptive scopes in the equation. So for now, I’ll select “Static” which let’s you manually select the location to where the retention policy should be applied. As the descriptive text explains, when new locations are added or existing ones change, you’ll have to manually update the policy to include these locations.
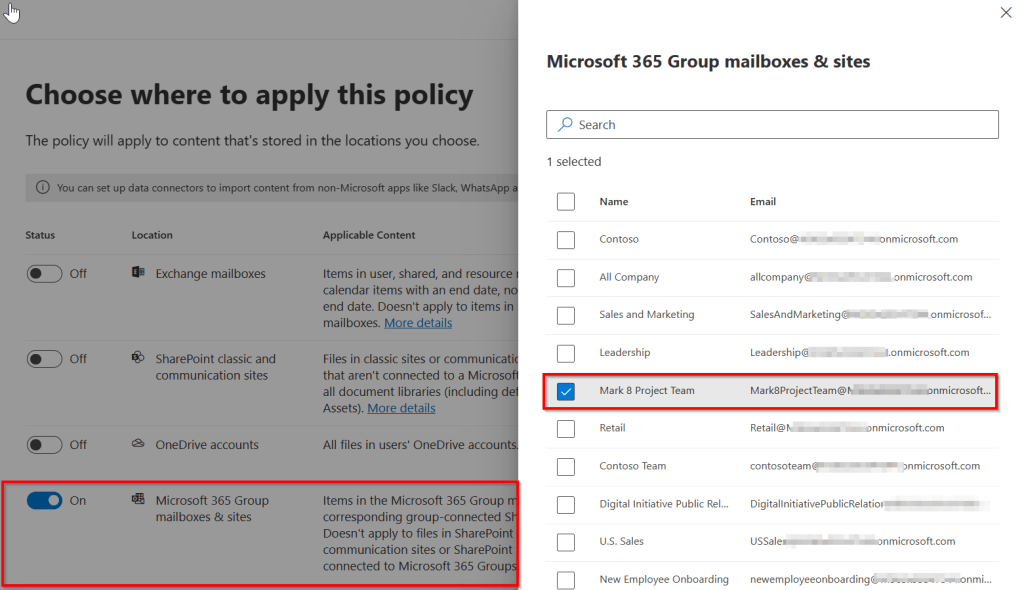
In the next screen we can select the locations to where this policy will apply. Here I’ve chosen “Microsoft 365 Group Mailboxes & Sites” and further narrowed it down to just the “Mark 8 Project Team” Microsoft 365 group mailbox & site.
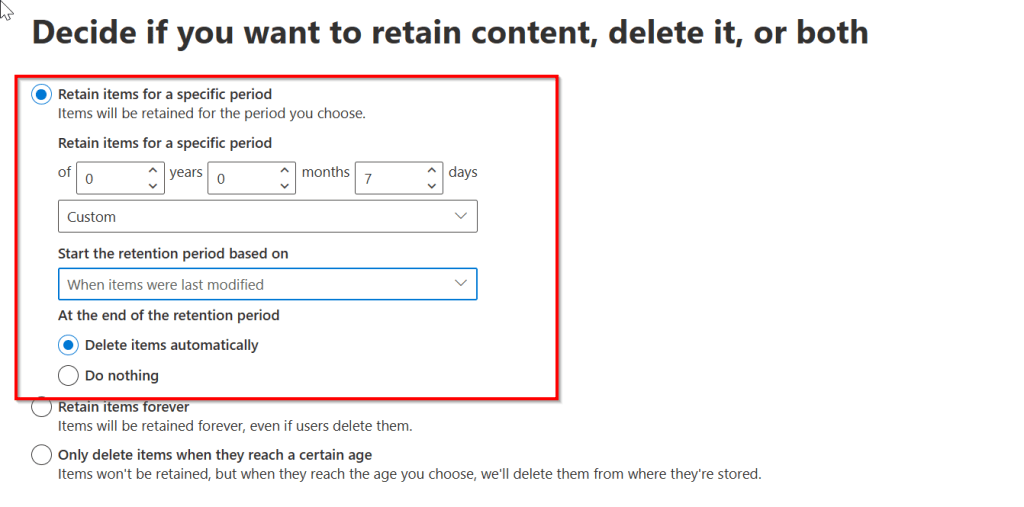
The next screen is where the action is at. Here we can choose what needs to happen with the content we specified in the previous screen. Items can be retained for a specific period after which they can be automatically deleted, they can be retained for ever or can be deleted when they reach a certain age. In this example, I choose to retain them for 7 days after which they will be deleted automatically. Note that this is just for demonstration purposes, in a live environment a period of a couple of years would be more realistic.
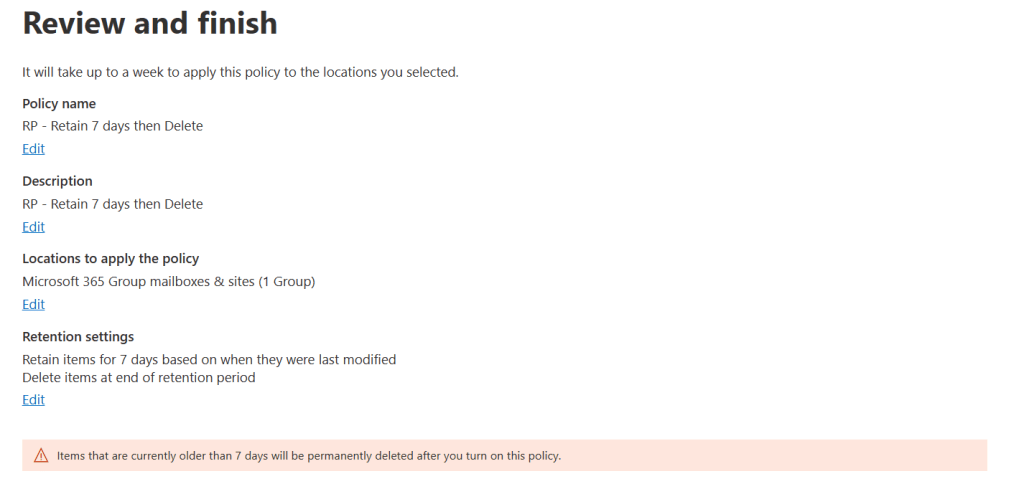
Take a look at the review screen and note that “items that are currently older than 7 days will be permanently deleted after you turn on this policy”. Also take a look at the line on the top of the summary mentioning “it will take up to a week to apply this policy to the locations you selected”. You will be notified of this fact once more when you end the wizard to create the policy.
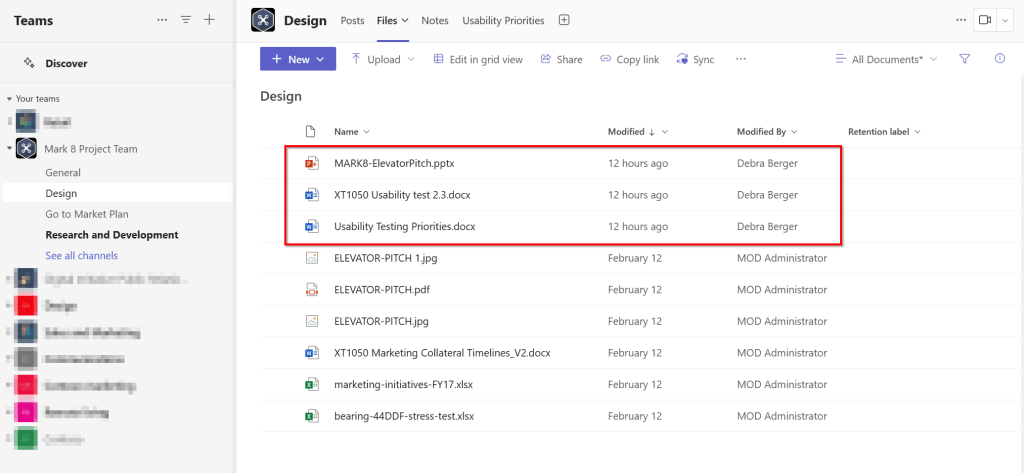
To close out this chapter, take a look at the “design” channel of the “Mark 8 Project Plan” team to which the retention policy was applied. Files in the Teams channel / SharePoint teamsite are all older then 7 days, with the exception of the files that are highlighted in the screenshot above.
Remember, retention policies are the foundation of your DLM configuration!
Configuring (Retention) Labels
Now that the foundation is in place with retention policies, let’s focus on the progress of configuring (retention) labels so that they can be used as an exception to the configured retention policy.
Navigate to “Data Lifecycle Management” and “Microsoft 365”. Click the “Labels” tab and click “Create a label”.

Again, create a name for your label that makes sense and can be used later to distinguish the label from other labels. Also, create a description for users and admins that make clear where the label should be used for.
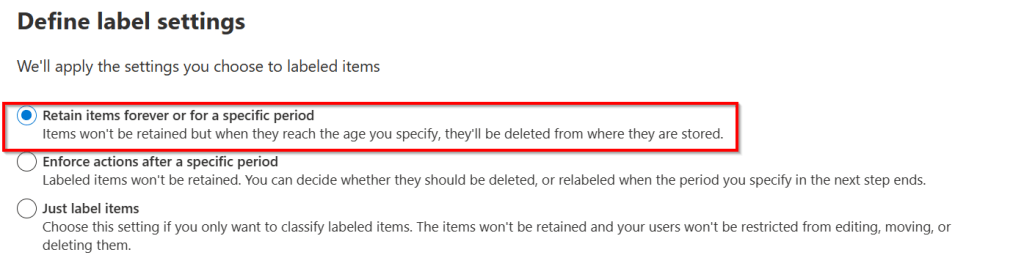
In the next screen, the label settings can be configured. You can configure to retain items for a certain period, enforce actions after a specific period or just label items with no action applied. In this demonstration I’ll retain items for a specific period.

The retention period has to be configured next. Here I choose to retain items for 7 years. The retention period is based on the last modification date of the item.

What has to happen after the retention period should be configured next. To keep this progress simple I’ve chosen to “delete items automatically”. Review the summary next and click “create label”. A new wizard appears telling you that your label has been created but that one of 2 actions have to happen next:
- Publish the label to Microsoft 365 locations. This way, users can use the label to manually apply it to their content.
- Auto-apply this label to a specific type of content. Using this path, you can create conditions that are used to match your content to which the label is then automatically applied.
For now, select “do nothing” and finish the wizard. This way, we can see each step of the process.
Publishing (Retention) Labels
As I would like to keep auto-applying of labels for an upcoming article, let’s publish the label to a Microsoft 365 location to see the (end-user) impact there. Let’s go!
Back in the Purview portal, make sure the “Label policies” tab is selected and choose “Publish Labels”. In the first pane of the wizard click “Choose labels to publish” and select the label that was just created. In my case that’s “RL – Retain for 7 years then delete”. In the admin units screen, click “next”.
The next screen asks us again whether it should use a adaptive or static scope, just as with the creation of our retention policy (even the title is the same 😄). Choose static for the sake of simplicity and in the next screen -which is also the same as with the creation of our retention policy- choose “Microsoft 365 group mailboxes & sites” and select “Mark 8 project Team”. In the last screen, give your label policy a name and description that makes sense. In my case it’s “LP – 7 Years then delete – Mark 8 Project Team SharePoint site”.

In the summary, be sure to notice that it can take up to a week for your labels to become available in the chosen location. If this label was published to a mailbox, the mailbox needs to have 10 MB of data before the label will appear. Now your retention label is published to the Mark 8 project team SharePoint site / Teams channel.
The user experience
So, what about the user experience? As stated in the beginning of the article, labels that are published to a location using a label policy can be manually applied by users or automatically applied by using pattern matching for example. In this example, we’ve published the labels so that a user can apply them manually to items. These items would be an exception to the retention policy we applied at the container level.
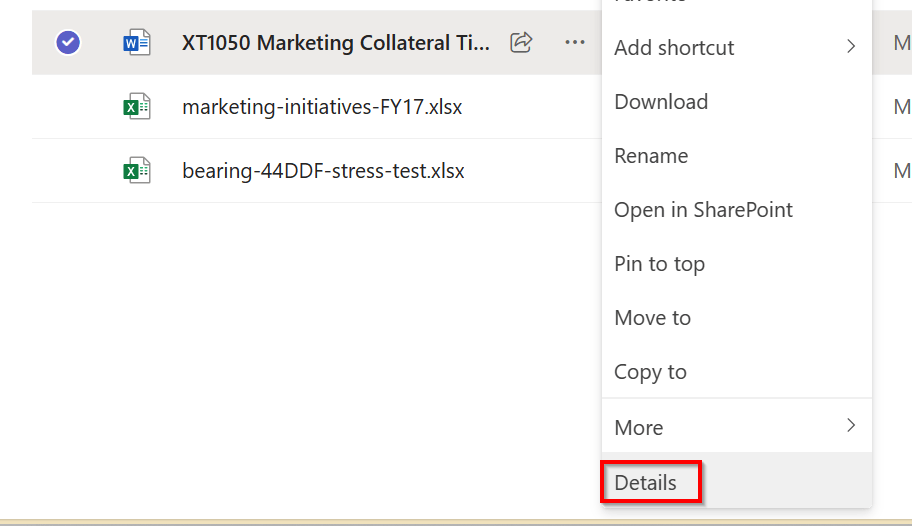
In the above screenshot, I’ve logged in to Microsoft Teams with user “Debra Berger”. Debra has permissions to apply retention labels. In the “Mark 8 Project Team” team, she selects a file and clicks “details”.

Here we can apply our published retention label “RL – Retain for 7 years then delete”.
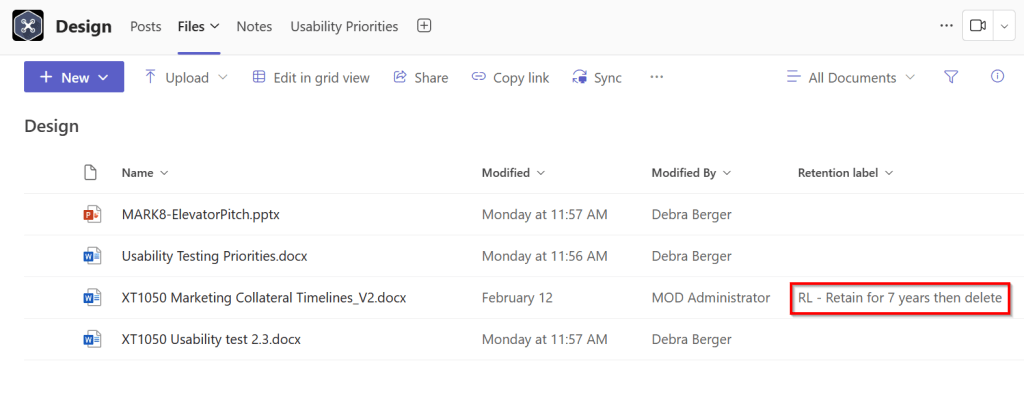
Fast forward a few days for all policies to take effect and notice how our files view in the “Mark 8 Project Team” – “Design” channel has changed. I’ve added a column to easily see which retention label is applied to which file. Remember the files that were shown at the start of this article? A lot of them are gone because:
- We applied a retention policy at the container level (Team / SharePoint teamsite) as an admin that deleted items that were older then 7 days.
- We manually applied a retention label that we published to the Team / SharePoint teamsite and added to the “XT101 Marketing Collateral Timelines_V2.docx” file.
- So only the files that are not older then 7 days and the file that was manually tagged remain in place.
How to see where labels are applied?
If you want to get a complete view of where your retention labels are applied, you can do so as follows:
Navigate to the Purview Portal and select “Content Search”, “New Search”. Give the search an appropriate name and description so you can easily find and re-run the search later.
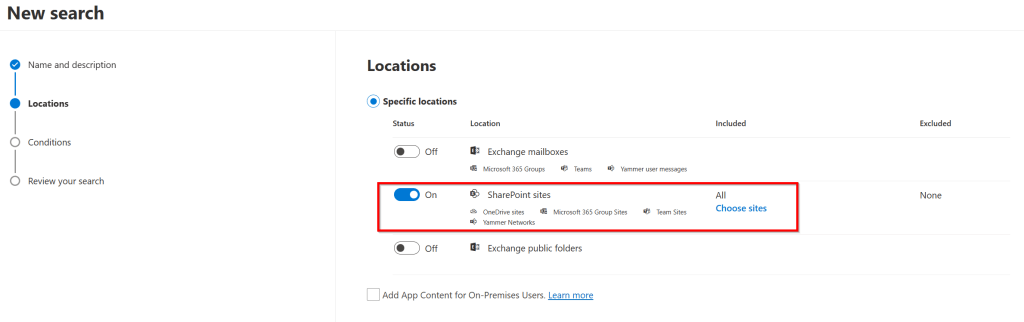
Specify locations. Here, I’ll use “SharePoint Sites”.
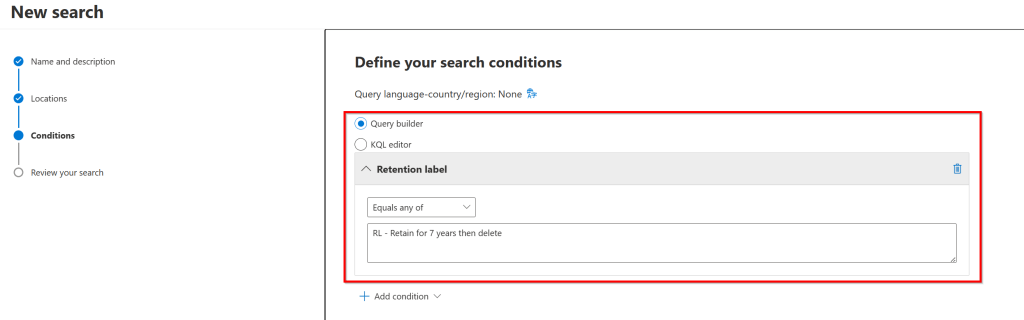
Define your search condition, in this example I’ll use “Retention Label”, “Equals any of”, “RL – Retain for 7 years then delete”. Review the summary screen and finish the wizard.
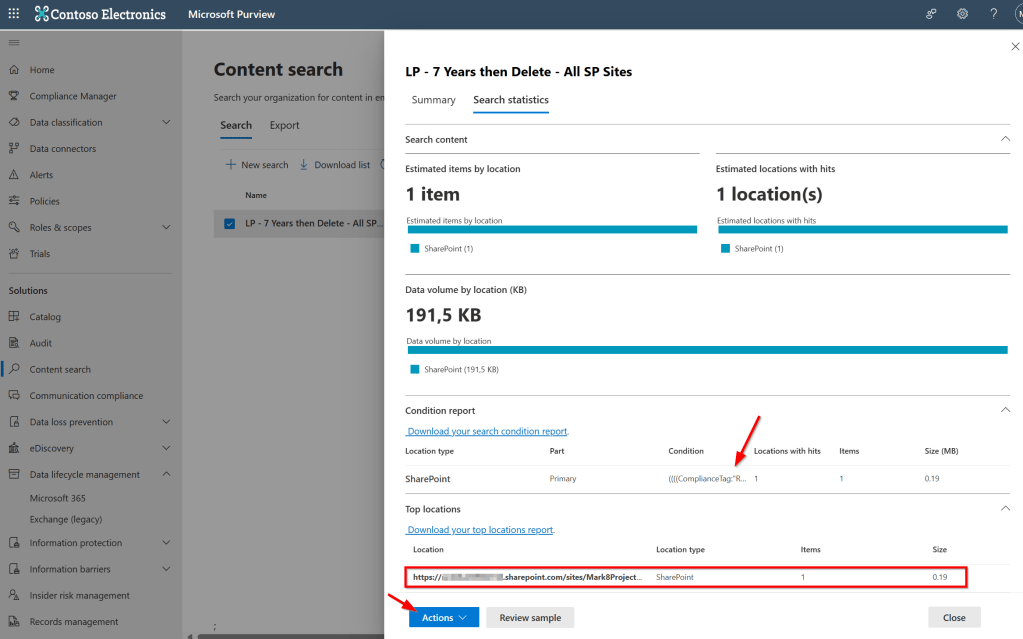
When looking in the details of the search result, you can see exactly where your labels are applied!
When only looking for documents that are labeled from within SharePoint Online, you can use the following trick.
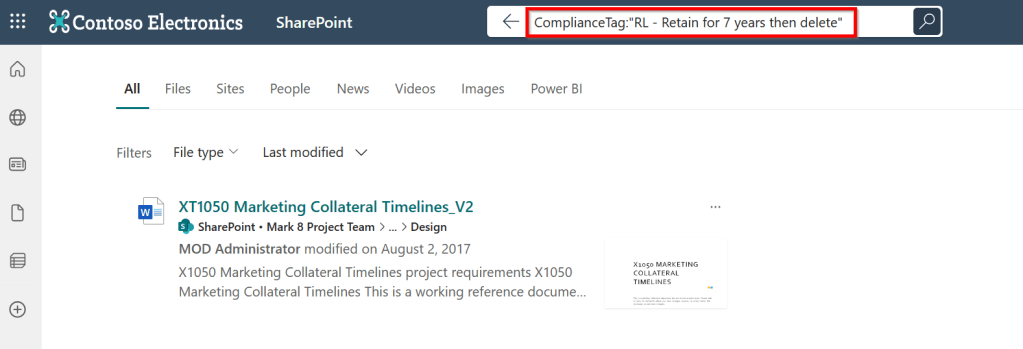
Navigate to Sharepoint Online and in the search bar type:
ComplianceTag:"Your TagName here"Documents labeled with your retention label will automatically show up! Note that this only shows documents that are within SharePoint online and are accessible by the user that performs the search!
How to see where Retention Policies are applied?
So as we saw above, retention labels can be easily seen by the user -whether it’s in Teams or in SharePoint- by looking at the details of a file or adding the “retention label” column to your view. Administrators can also utilize Content Search or users may use SharePoint Search.
So what about retention policies? As stated earlier, they are invisible to the end user as they are applied by your admin or lifecycle management department at the container level. So we can use “policy lookup” as admin or someone with the appropriate role group to check where retention policies are applied.
Policy Lookup – Search within a Team / Microsoft 365 group
In the DLM toolbox, we can use “Policy Lookup” to see where certain retention policies are applied. First, navigate to your Microsoft 365 admin center and navigate to “Teams & Groups”, “Active Teams and Groups”.
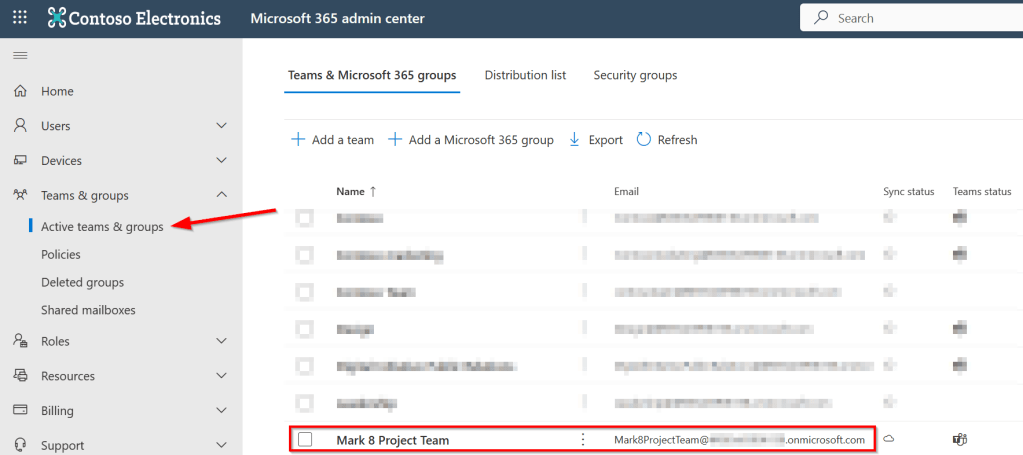
Look for the Team that you want to look up retention policies for and copy it’s email address.

Now navigate to the Purview portal, Data Lifecycle Management, Microsoft 365, Policy lookup and select “Microsoft 365 Group”. Next, paste your copied group email address and click “search”. There you have it, it shows all your retention policies AND label policies that are applied!
Hope you found this useful, see you next time!

5 thoughts on “Microsoft Purview 101: Data Lifecycle Management (DLM)”