Records Management in Microsoft Purview can be used to:
- Setup a retention schedule for your files or folders (Just as with Purview Data Lifecycle Management)
- Mark items such as Word, Excel or Powerpoint files as records.
When an item such as a file or folder becomes a record, the item or it’s contents cannot be changed any more. This is often done to comply with legal requirements, such as those that require a certain company to retain their documents for a certain period of time and during that time, the files (that have become records) cannot be altered by anyone. This article will explain how to configure the basics of Records Management, and will show you the end-user experience.
Differences between Records Management (RM) and Data Lifecycle Management (DLM)
Let’s start by looking at the differences between Data Lifecycle Management and Records Management.

The new Microsoft Purview portal explains the differences pretty nice actually. Both features have a certain amount of overlap as they both use retention labeling to manage retention of your items. However, it’s the purpose of configuring retention labeling where both features differ. Data Lifecycle Management is used to manage your content so you keep what you need, and delete what you don’t. Items that are not present in your environment can not be misused, right?
Records Management on the other hand is used to automate and simplify the retention schedule for regulatory, legal, and business-critical records. And as said earlier, “records” are your items (or files) now turned into a static object called a record. They still look like a Word, Excel or PowerPoint file for example, but they can’t be changed in any way. In other words, marking items as a records makes the item immutable. The following actions are prevented when an item is marked as a record:
- Changing the retention of an item.
- Change the contents or metadata of the item.
- Deletion of an item or removal of the retention label that is applied to the item.
- Moving a file between SharePoint libraries.
File Plans
The Microsoft Purview Records Management solution uses a file plan to manage retention labels. Using the File Plan, you can (bulk) create labels and publish or auto-apply labels to a certain location, such as Exchange mailboxes, SharePoint sites and OneDrive Accounts.
Publishing to a certain SharePoint site for example can be done manually by selecting the site, or by using Adaptive Scopes. When auto-applying labels, you can target your label to be automatically applied to content that matches a certain filter, for example content that contains sensitive info, content that contains specific words or phrases, or has certain properties.
Other properties that your file plan includes are:
- Status of your labels (Active, or Inactive)
- Where your label is based on (for example “when created” or “last modified”)
- Whether your label marks item as a record.
- Whether your records should be unlocked by default.
- Whether content should be relabeled.
- The duration of the retention.
- The disposition type that applies when items are to be deleted (for example “No Action”, “Auto-delete” or “Review required”).
- Metadata of your labels (not required).
- Last modification date of the label and who was responsible for the modification.
Configuring Records Management
Let’s configure some labels from within the Records Management Console. Let’s say for this demo we want to create a retention label that is published to a certain SharePoint site so users can label folders (and items within that folder) to become a record. After a couple of days (because I don’t want to wait a year before showing you the result) the items marked as records are placed on a disposition list for review after which they are deleted. Ready? Let’s go!

Navigate to the Microsoft Purview portal and click “Records Management” on the left hand side. Within Records Management, navigate to file plan (remember the name?) and click “Create a label”.
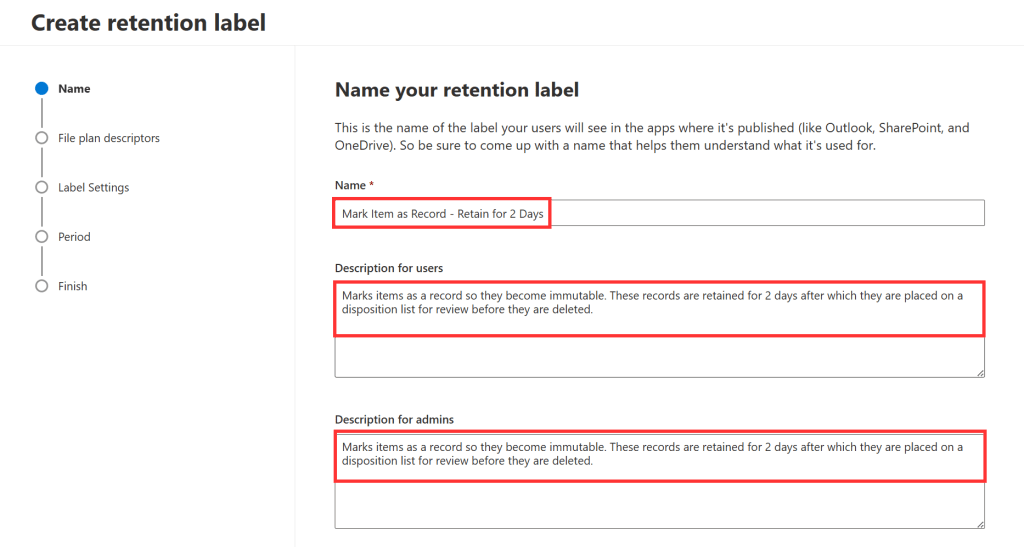
Give your label a logical name, as it will show up in your users Teams or SharePoint environment alongside the description for users. So this will be equally important.
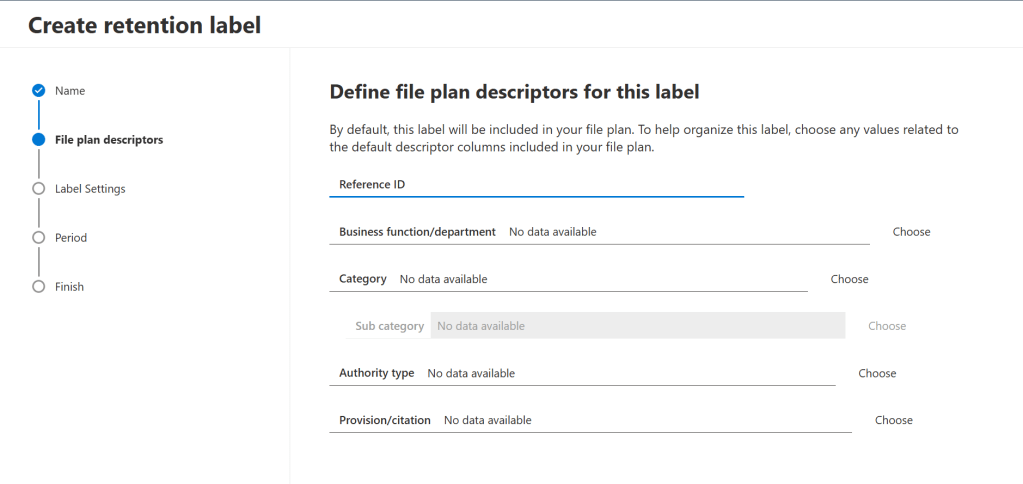
In the next screen, you can configure file plan descriptors (metadata of your label), which I’ve discussed earlier in this blog. I’ll ignore them for now.
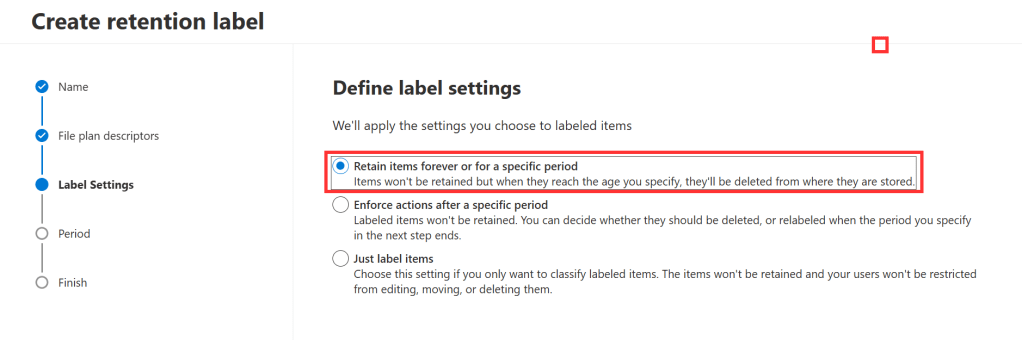
In the next screen we can configure what will be done to files or items that are labeled with this label. For this demo, I choose to go with “Retain items forever or for a specific period” because I want to show you the disposition list feature in Records Management.
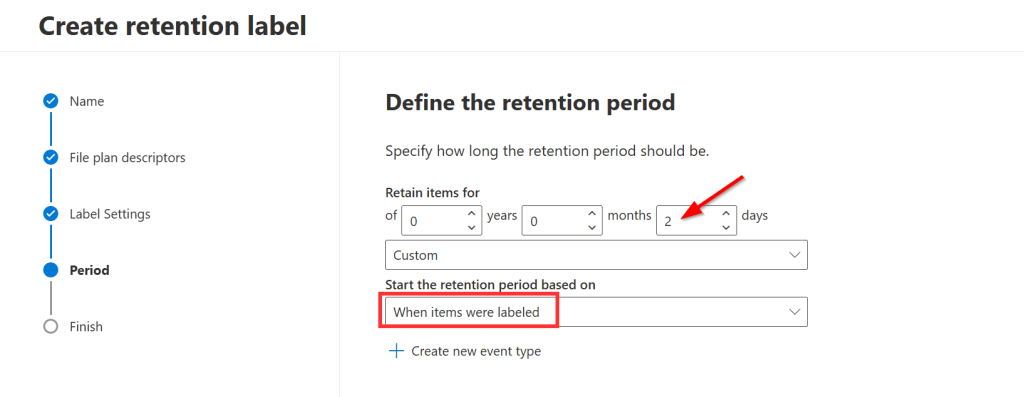
So as I told earlier, I’ll go with a retention period of 2 days and that retention period will start when the label is applied.
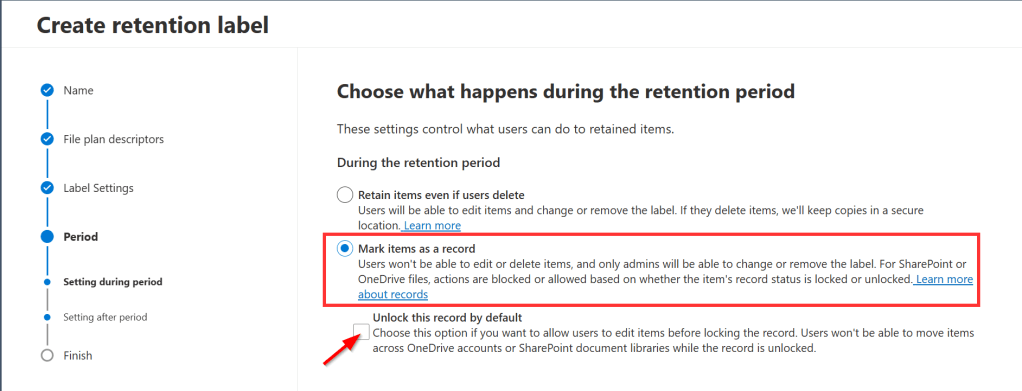
First, we’ll have to choose what happens with your items (files) during the retention period. Since we want to check out record management, we’ll mark the items as a record.
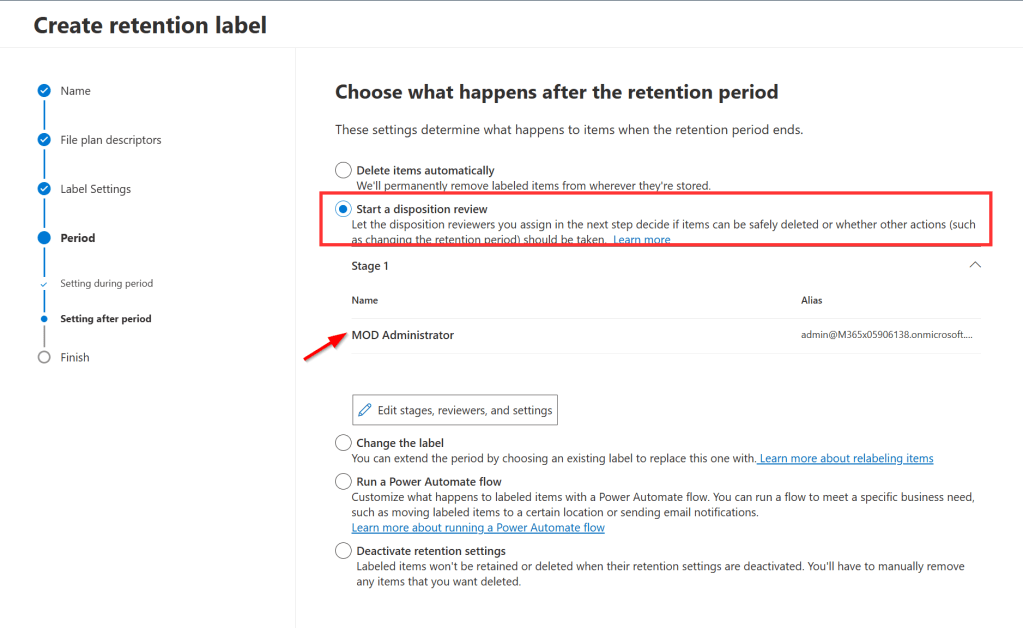
Second, you get to choose what happens with your items after the retention period. I want to show you what a disposition review does since it’s a feature specific to records management. With disposition reviews, certain users or departments in your organization are tasked with reviewing items after the retention period is over, but before the items are deleted. The items will show up in a disposition list that needs to be reviewed by one or multiple users. This is what is set up in this screen. Here you can configure 1 or multiple stages and add certain people or groups to each stage. When you configure multiple stages, a user in each stage should review an item before it is actually deleted or for example is configured with another label that can extend the lifetime of an item.
After the disposition review has been configured, take a look at the summary screen and finish the wizard.
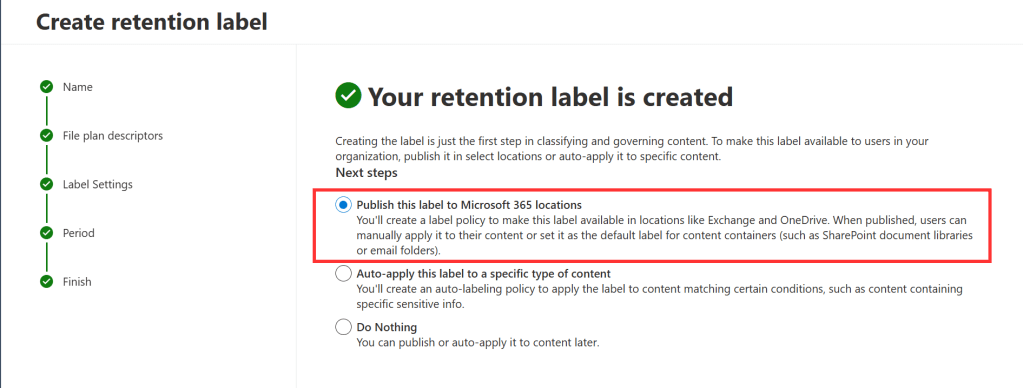
As with Data Lifecycle Management, labels have to be published to a location before it can be used by your users. It can also be auto-applied as stated earlier, but this is out of scope for this article.
I’ll select “publish this label to Microsoft 365 locations” so the next wizard to publish the new label is automatically started.
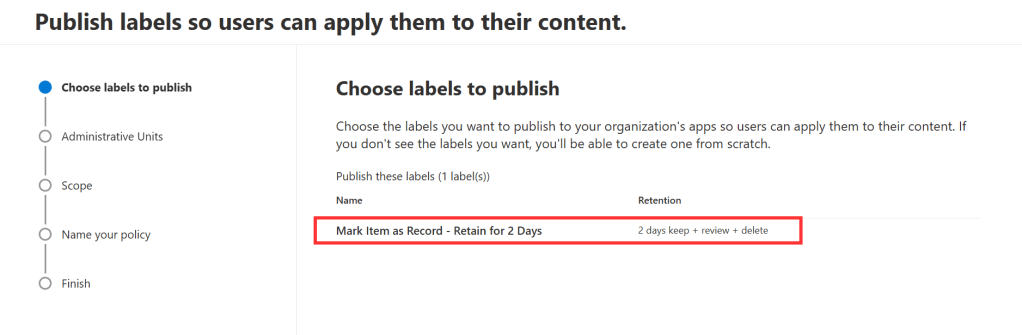
The label that’s just created is already selected. In the policy scope screen, we are going to use the default of “Full Directory”.
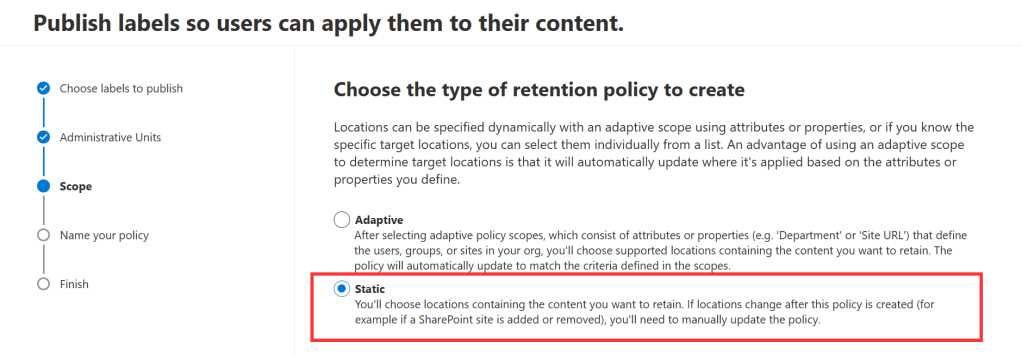
The publication of labels isn’t different than if you would use Data Lifecycle Management, so to keep this article as simple as possible our new label will be targeted to 1 site. If you would like to know more about adaptive scopes, I would urge you to take a look at my article on the matter.

Select “let me choose specific locations” and in the “included” column, select your desired SharePoint site or the Microsoft 365 group where it’s based upon. I’ve included my “High Five Sky High” Microsoft 365 Group / SharePoint site.
Next up, name your policy and take a look at the review screen. Finish the wizard.
The view from the user / Records Manager
Let’s take a look on the user side of things. Ideally, the upcoming tasks will be performed by someone of your records management department. For this demo, I’ve created a folder called “Project Codename Kitesurfing” within a standard channel with an equal name in the SharePoint Site / Team “High Five Sky High”.
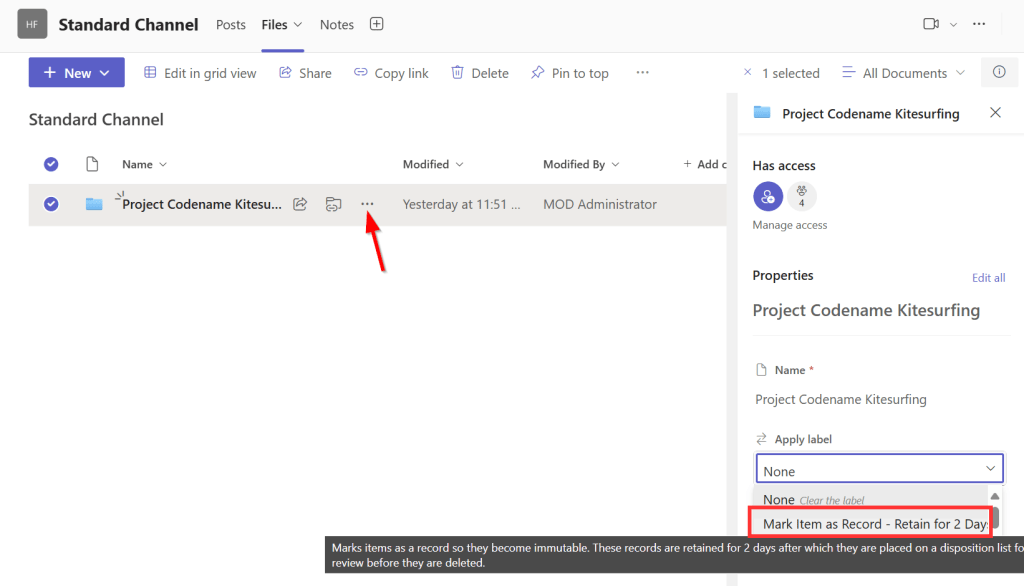
Since the project has come to an end I want to mark the folder and it’s contents as a record. To do this, I click the 3 dots, choose “details” so the flyout menu on the right side opens. Under “Label”, our label “Mark Item as Record – Retain for 2 Days” (note that it also shows the configured description) can now be selected.
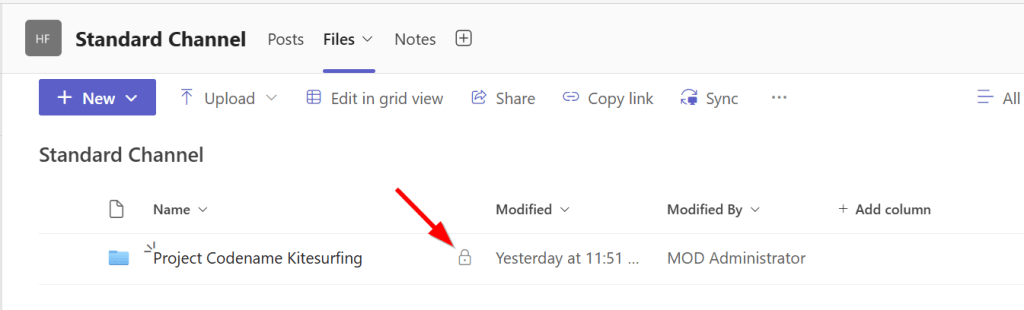
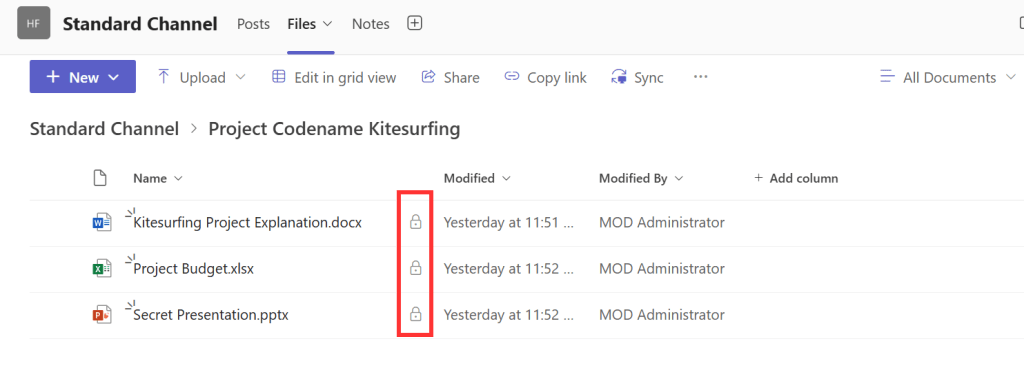
Immediately, the folder gains a padlock icon on the right, telling us that the folder and it’s contents are now marked as record. So let’s bring some of the theory above into practice. Let’s try to edit the contents of the document.

As expected, this fails. The yellow ribbon tells us the document is read-only.
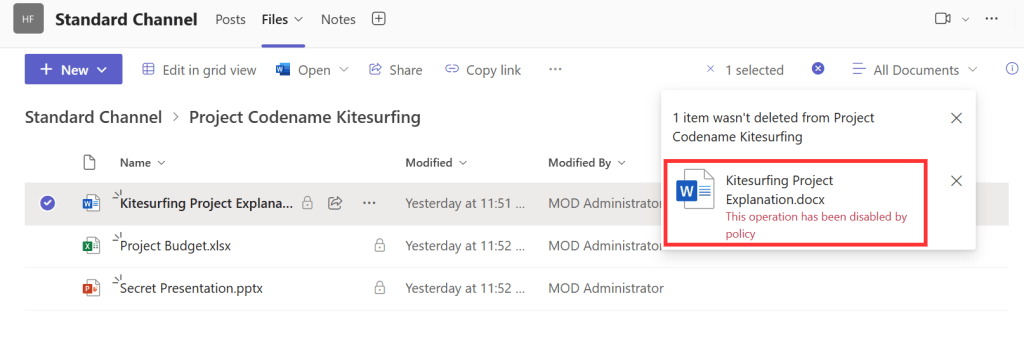
Trying to delete the document also fails with error “This operation has been disabled by policy”. Ain’t that great?
Fast forward a couple of days…
…And the files will show up on your disposition list. The disposition list can be seen by navigating to the Microsoft Purview portal and clicking the “Records Management” button on the left hand side. Within Records Management, navigate to “Disposition”.
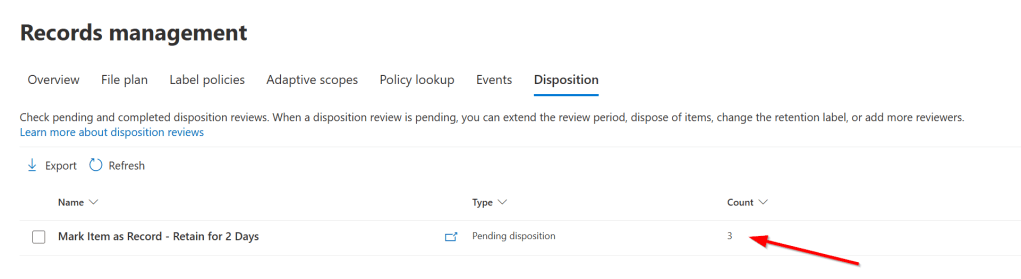
As can be seen, the name of your file plan and the current number of documents included on it’s disposition list is present.
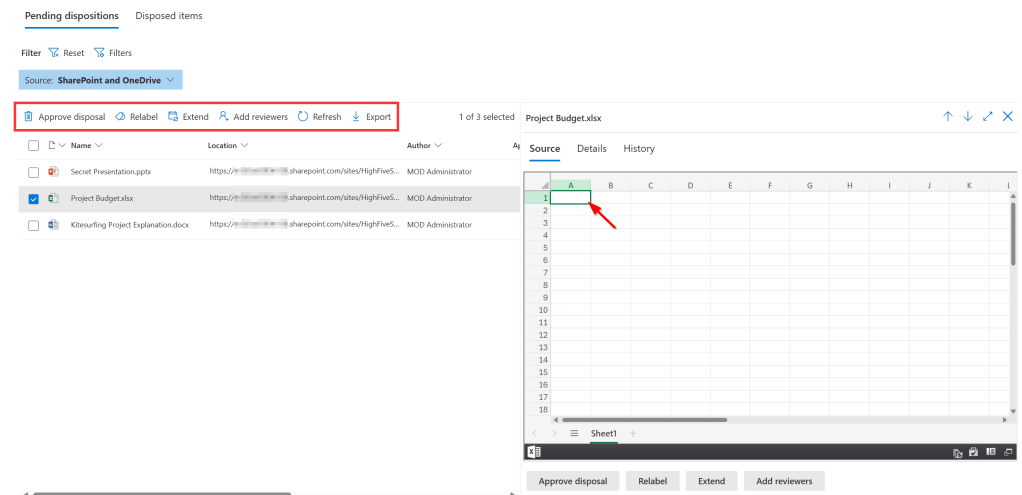
Now when you click your file plan followed by the “open in a new window” button you’ll see an overview of the items currently pending disposition. You can filter the list by using the filter button on the top of the screen.
Note that if you want to see previews of your items you’ll have to be a member of the “Content Explorer Content Viewer” role group, which can be found in the Purview portal, Roles & Scopes, Permissions. If you only want to see a file’s label but not its contents, you can add a user to the “Content Explorer List Viewer” role group.
In the portal, you are able to execute the following actions on the items in the disposition list:
- Approve disposal, after which the files will be removed. This process can take up to 15 days before the files are permanently deleted from the location where they’re stored.
- Relabel the files, after which a new label will be applied (with different settings).
- Extend the disposition date, after which the files will show up on the disposition list again.
- Add reviewers, to select someone from your organization to also review the pending disposition.
- Export a comma separated file that contains the files name, location, title or subject, tagname (label name), comment, name of the account that deleted the content and the delete date.
Differences between Retention Labels, Records and Regulatory Records
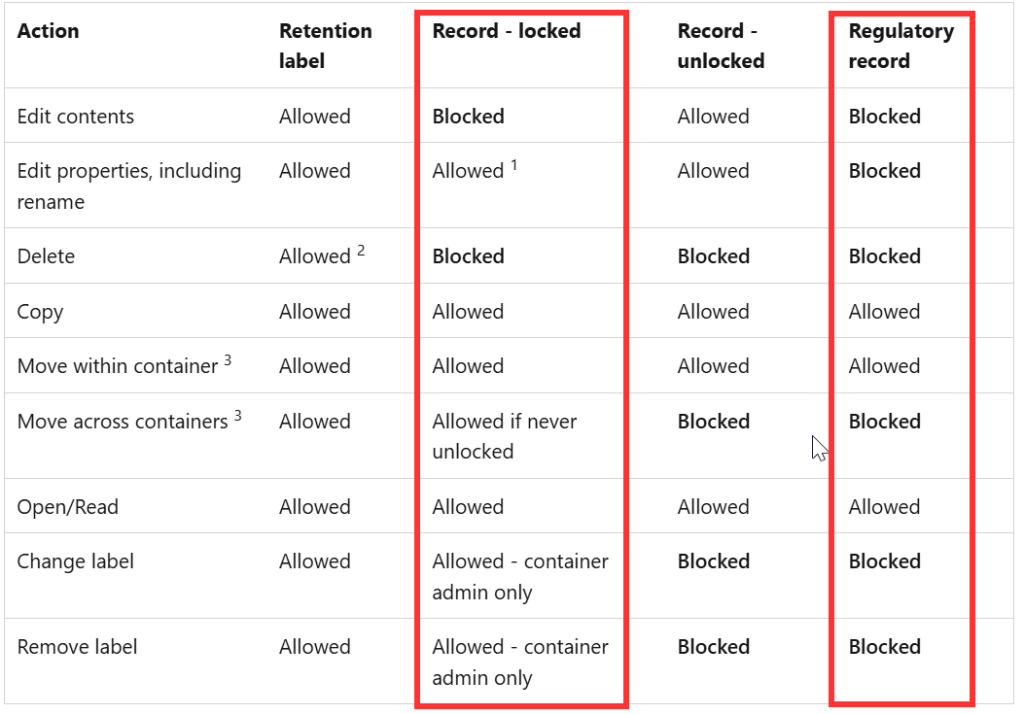
As can be seen in the table above, records have certain allowed actions but also restrictions. Where all actions are allowed with retention labels (that are configured using Data Lifecycle Management), items that have the “record” status cannot -for example- be edited or deleted. Of course this make sense, because the exact function of declaring an item as a record is making sure its contents cannot be altered anymore.
But even when an item is declared a record, properties can still be edited by default. If you don’t want this, there is a tenant option to block this behavior. This option can be found at Records management – Records management settings – Retention labels – Allow editing of record properties.
Another -more restrictive option- is to declare items as a regulatory record. The table above shows exactly how restrictive this option is. When comparing regulatory records to normal records, items declared as regulatory records properties cannot be changed, the items declared as regulatory record cannot be moved across containers (SharePoint sites, OneDrive accounts, and Exchange mailboxes), but the most restrictive option is that labels cannot be changed or removed anymore (not even by global administrators!).
Also good to note about regulatory records is:
- Retention period of an item declared as regulatory record cannot be made shorter, but only be extended.
- Retention labels that configure items as regulatory records do not support auto-labeling policies.
- Retention labels that configure items as regulatory records cannot be applied to items that are checked-out.
When you’ve gone through all of the above and you still want to declare items as regulatory records, you will have to enable the option first by connecting to the Office 365 Security & Compliance PowerShell and running the following cmdlet after which you can select marking content as regulatory record in the retention label wizard:
Set-RegulatoryComplianceUI -Enabled $trueBe sure to take a look at the following Microsoft Learn articles before you decide you need to have regulatory records:
- https://learn.microsoft.com/en-us/purview/declare-records
- https://learn.microsoft.com/en-us/purview/records-management#compare-restrictions-for-what-actions-are-allowed-or-blocked
How to see where labels are applied?
If you want to get an overview of where your retention labels are applied, take a look at the corresponding section of my article on Data Lifecycle Management (DLM) as the steps to get an overview of locations where your record labels are applied is the same as with DLM!
Hope you found this article to be useful!

4 thoughts on “Microsoft Purview 101: How to Setup Records Management”