In a previous article, I explained the process of setting up Purview Records Management to protect your business-critical items that have to adhere to regulatory and legal standards. In this article I want to show you 3 global settings that change the behavior of Records Management.

To find this settings, navigate to the Purview portal, select Records Management and click the ‘Records Management Settings’ button in the top right.

At first, we are greeted with a banner telling us that “Records management settings apply across the tenant. If your role group permissions are restricted to a specific set of users or you do not have SharePoint administrator permissions, you’ll only be able to view these settings”. In other words, if your role group permissions restrict you to not see all users or you don’t have SharePoint Administrator permissions, you are not able to set up one of these global settings.
Now, let’s break down the 3 options we have here and take a look at the effect they have on your environment.
Setting 1: Deleting content labeled for retention

The first option ‘deleting content labeled for retention’ almost speaks for itself. Just as it’s outcome. When both options “allow users to delete items on OneDrive” and “Allow users to delete items on SharePoint sites” are enabled, the outcome might be exactly what you think. However, note that this setting (and only this setting on the page) doesn’t apply to items marked as records, since you can’t delete those. So, only items with a retention label that doesn’t mark the item as a record can be used in this case. Let’s take a look.

First, we apply the ’employee records’ label (Sorry for the confusing name, as the name ‘records’ in the label has nothing to do with the label being a record in compliance terms) to the file ‘Ad Slogans.docx’. It makes sure items are retained forever.

When the file is deleted, it is removed just like you probable thought it would be. But is it? It cannot be seen by the user anymore, but Purview made sure it’s retained somewhere so it complies with the label it has been configured with.
It actually is moved to the ‘PreservationHoldLibrary’ of the site in question, which you can navigate to by pointing your browser at:
https://YourSite.sharepoint.com/sites/SiteName/PreservationHoldLibraryNote that the PreservationHoldLibrary can only be accessed by the site’s owners and is hidden, so it can’t be seen in ‘Site Contents’.

When looking into the folder, we can now see that our ‘Ad Slogans.docx’ file is now moved here and now has a suffix added to it’s name containing a GUID that resembles the unique document ID of the original document and a date/timestamp.

When you switch the ‘deleting content labeled for retention’ settings to off, users are not able to delete the file. So the file is then retained ‘in place’.
Setting 2: Configure record versioning

Onto option number 2: ‘Configure record versioning’. This option configures whether users can unlock items that have been marked as a record so they can then edit the documents. This may or may not be a thing you want to have for your organization.
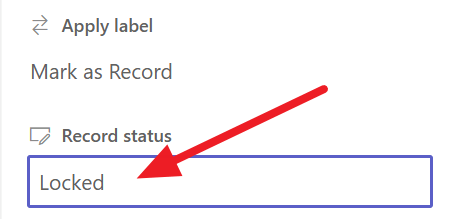
When the ‘enable record versioning’ option is set to ‘off’, users are not able to unlock a document that’s declared a record. If they take a look at the record status property of the document, the ‘locked’ status can not be changed.
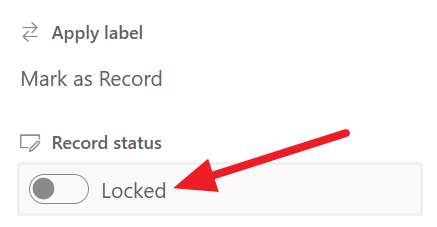
However, when the ‘Enable record versioning’ option is set to ‘on’, users are able to unlock the record and make changes to the document. Whether if that’s something you want is up to requirements of your organization. But, as with the former option, also in this case Purview makes sure the previous version of your file which was already declared as a record is stored in the PreservationHoldLibrary, to be exact in the ‘Records’ folder. The exact process works like this and is started when a record is unlocked:
- The Preservation Hold Library and it’s Records folder is created if it doesn’t exist yet.
- The latest version of the document (without any previous versions) is copied to the Records folder. Almost like with setting 1, it now has a suffix added to it’s name containing a GUID that resembles the unique document ID of the original document. However, here the version of the file is added as a suffix instead of the date/time.
- The copy created in step 2 is added to the version history of the original document. The comments field is stamped with the word ‘Record’.
- The original document is now a new version that can be edited.
Let’s see how this works.
First, I’ve enabled the option ‘Enable Record Versioning’. After this, I apply a label to a document called ‘CE Annual Report.docx’ and lock the record. This can be seen in the screenshot above. Note that at this point, there is no version of this document in the Records folder in the Preservation Hold Library.

Now let’s unlock the record.

As stated, the latest version of the file is copied to the Records folder.

As can be seen in the version history of the file, version 1.0 is the one that’s in the Preservation Hold Library Records folder and version 2 is now the new ‘live’ version that’s also stamped with the comment ‘Record’.

When the process is repeated and the record is locked and unlocked a second time, we can see the same behavior. Version 3.0 is sent to the Preservation Hold Library Records folder and version 4 is now the new ‘live’ version that’s also stamped with the comment ‘Record’.
Setting 3: Allow editing of record properties
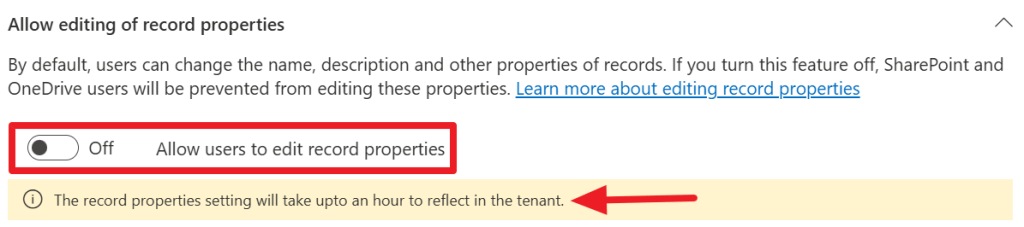
When the ‘Allow users to edit record properties’ switch is turned off, the following behavior is configured.
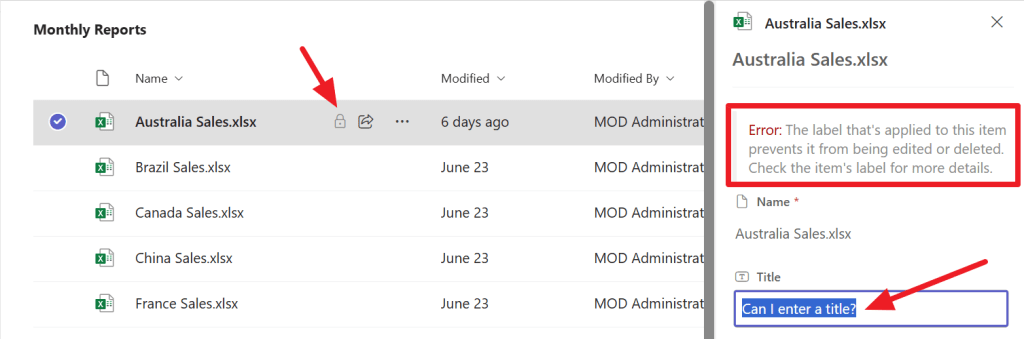
In the above example, the ‘Australia Sales.xlsx’ file is marked as a record as we can see a lock icon. When I want to rename the title property of the file an error appears stating ‘Error: The label that’s applied to this item prevents it from being edited or deleted. Check the item’s label for more details.’.
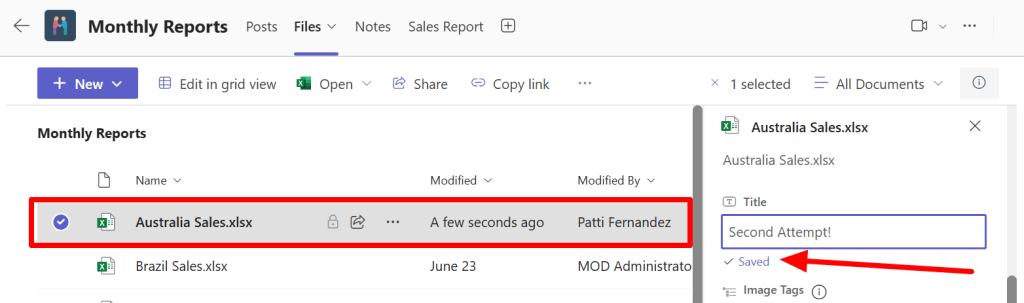
Now, when the ‘Allow users to edit record properties’ switch is turned on, your users can safely edit the records’ properties.

While this change isn’t forcing a copy or move to the Preservation Hold Library Records folder, it does trigger an entry in the audit log. As can be seen in the screenshot above, a ‘Modified file’ operation is logged on the ‘Australia Sales.xlsx’ document.

While we are not able to see the exact change in the audit log, we can by looking up the version history of the file and match the timestamps. Do note that in this example timestamps differ a little bit because of different time notations used.
If you want to know more about the processes above, be sure to take a look at this and this Microsoft Learn Article. Cheers!
