When talking about Microsoft Purview, it goes often hand in hand with data classification. But how can we classify our data? Microsoft Purview provides us with a few different options to do this:
- Manually by an administrator or your users.
- By using automated pattern-matching.
- By using classifiers
After your data has been classified, you can take a closer look at where your sensitive data resides (for example with Data Explorer or eDiscovery) to get an overview of your information, or use the various tools in Purview to protect your sensitive data. This article covers classifying your data, if you want to take a closer look at the tools that protect your data, take a look at my articles on Data Loss Prevention, Data Lifecycle Management and others.
Introduction to Data Classifiers in Purview
When talking about manually categorizing your content you can use pre-existing labels or sensitive information types or you can create custom ones yourself and use these to protect your data and manage it’s lifecycle.
Automated pattern matching can find content automatically using the following techniques:
- Matching of keyword or metadata values using the Kusto Query Language (KQL)
- Previously identified patterns of sensitive information. Examples are credit card numbers or social security numbers which can be identified using a specific pattern. In Purview terms, this is called a Sensitive Information Type (or SIT in brief). At time of writing, 324 SIT’s are preconfigured to identify sensitive information ranging from Azure Storage Account Shared Access Signatures to U.S. Physical Addresses. If these don’t suit your needs, you can also create custom SIT’s.
- A variation on the SIT’s above are Fingerprint based SIT’s, which can identify items when they are based on a template.
- Exact Data Match which searches for -you guessed it- exact data (strings) in items.
If your items aren’t easily identifiable by one of the methods above, a classifier can be used as a categorization method to identify items on what the item is, instead of matching elements in the item which is done with pattern matching. These come in two flavors: pretrained classifiers that are provided by Microsoft and trainable classifiers, which can be used when pretrained classifiers don’t match your needs. Trainable classifiers use AI and machine learning to recognize items.
Let’s dive in and take a look at how each of these classifiers can be configured!
Sensitive Information Types (SIT’s)
Let’s navigate to the Purview Portal, select ‘Data Classification’ and ‘Classifiers’. On the right hand side, let’s go for ‘Sensitive Info types’. Search the list for ‘Credit Card Number’ and open it. Now let’s create a copy so we can edit it’s properties to take a look at it’s configuration.
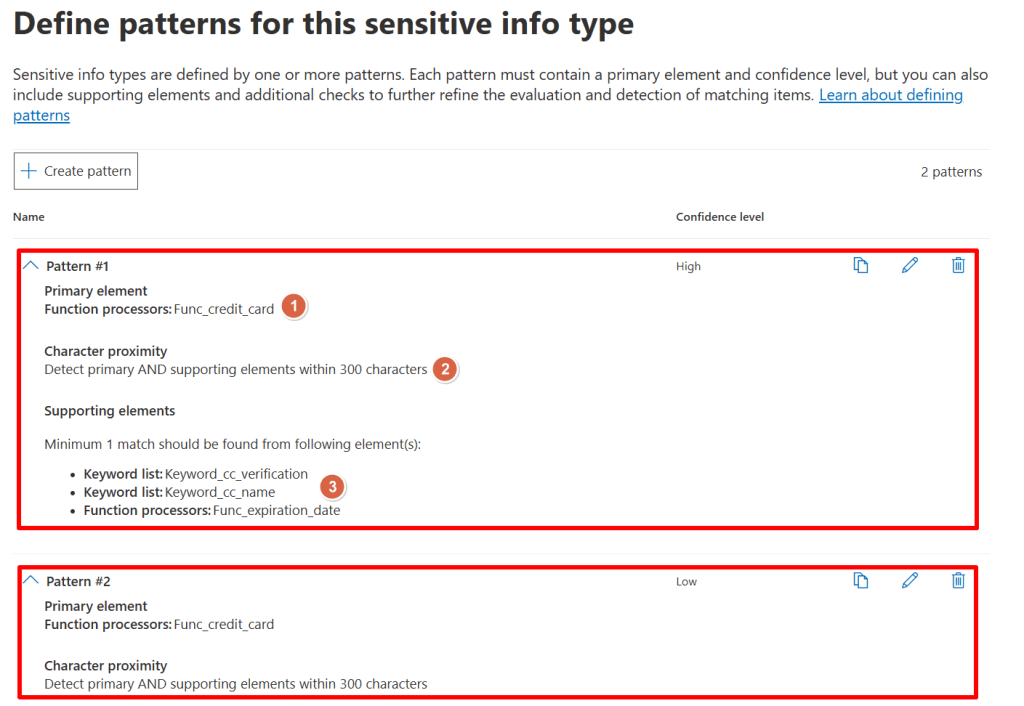
As can be seen in the image above, the ‘Credit Card Number’ SIT checks items for 2 patterns:
- Pattern #1, which is considered a high confidence level when matched.
- Pattern #2, which is considered a low confidence level when matched.
Now let’s dive in the details of Pattern #1. When editing the pattern (I will spare you all the screenshots), the following can be examined:
- It’s primary element is to use a function called ‘func_credit_card’ which is a function written by Microsoft that looks for Credit Card Numbers. The number found must pass a test in the function so the function can be sure that it is indeed a Credit Card Number.
- In addition to the above primary element, it searches the 300 characters before and after the found Credit Card Number for an supporting element. Which in this case, is 1 of the following:
- A keyword from the ‘keyword_cc_verification’ list which contains a list of variations of the word ‘card identification number’.
- A keyword from the ‘keyword_cc_name’ list which contains a list of Credit Card companies.
- A function that looks for an expiration date.
When the logic from the above pattern is true and thus the primary element is found AND is accompanied by 1 of the 3 supporting elements, it’s considered a match with a high confidence level.
Now, what about Pattern #2? It only uses the ‘func_credit_card’ function to look for a Credit Card Number but doesn’t use any supporting elements. When the logic from Pattern2 matches it’s also considered a match, albeit with low confidence.
When building your own SIT, all of the elements in the examples above can be manually configured and created to match your needs. Ain’t that great?
Fingerprint based SIT’s
A fingerprint based SIT is somewhat different than your regular SIT. Where the regular version looks for certain elements in a document, the fingerprint based SIT has knowledge of a certain template that is being used for a certain document type.
Let’s go with an example here. Say your organization has a document template that it uses for all their invoices. You are absolutely sure that this template is used for every invoice that is being sent out the door. You can use the following procedure to create a document fingerprint of the template that you use for your invoices in this case. Let’s configure this.

Start by creating a docx file from your template if it exists as an dotx file. The one I use can be seen in the picture above. This is needed cause the dotx file type is not supported. Purview creates it’s own small XML file that acts as the document fingerprint, or template if you will.
Now let’s navigate to the purview portal and navigate to ‘Data Classification’ and ‘Classifiers’. On the right hand side, let’s go for ‘Sensitive Info types’. Click ‘Create Fingerprint based SIT’.
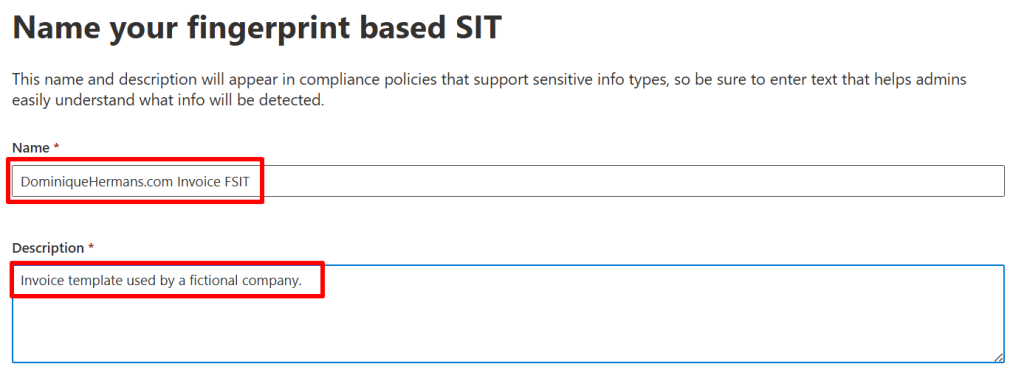
Give your SIT a name and description and click next.
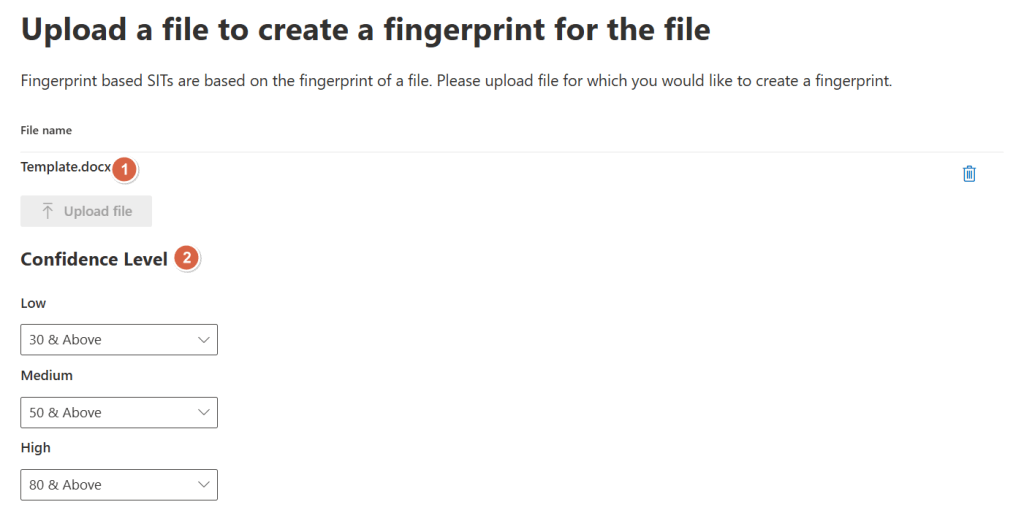
Now, select your docx file that contains the template. Confidence levels may be adjusted if you want. The numbers here resemble the percentage of text that has to be available in the document you encounter and match against the fingerprint based SIT. So, a 30% or above text match generates a low confidence level, a 50% or above match generates a medium confidence level and so on.
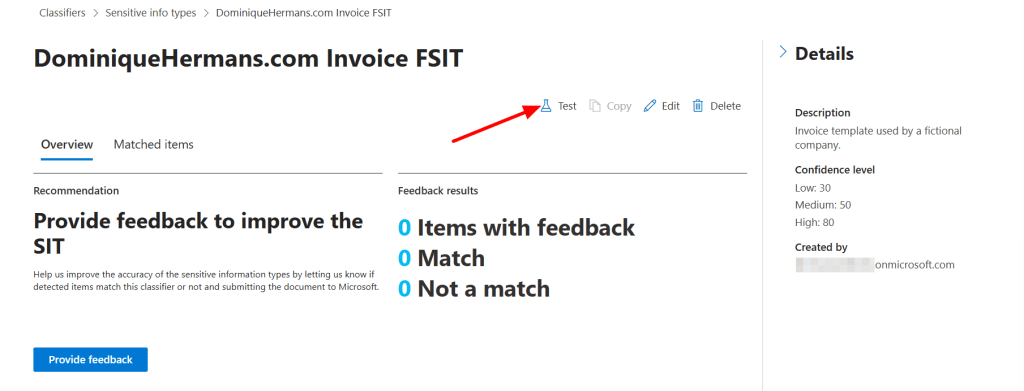
Let’s test our fingerprint based SIT. Navigate to Sensitive Info Types, scroll down and select your newly generated fingerprint based SIT. Click ‘Test’ and upload a document that has been created based on your template.

It will now show you the match results of the file you uploaded against the created fingerprint based SIT.
Exact Data Match (EDM) Classification
Let’s move on to Exact Data Match (EDM) Classification. The previous classifiers we’ve talked about all use a mechanism to match items using a certain technique, being able to get a closest match as possible when classifying data. But, if you are sure that certain elements reside in your documents, why not let it classify data using an exact match? You guessed it, that’s where Exact Data Match (EDM) comes into play.

With EDM, you feed Purview with a database of information that it should look for in your documents. In the example above, a list of employee records is uploaded into Purview so the service can recognize files that are present in the database. Let’s take a look at the process involved.

Creating an EDM classifier involves navigating through different steps. They are neatly outlined by Microsoft in the image above, which you are presented with when creating EDM classifiers. Let’s walk through the steps one by one.
Discover and prepare your sensitive data

In this step you’ll need to create 2 files in a supported file format (csv, tsv or pipe-formatted). The first file contains sample data, as the one that is shown in the picture above. The service uses this file to detect colums so you can specify which will be your primary fields (unique values) and secondary fields (values that are present in close proximity with your primary fields).
Next, you’ll need a file that uses the same colums as the ones you used in your sample data. However this time, you need to fill the file with actual data from your environment. As this is data that can be highly sensitive, only hashes of the values in the file will be uploaded to the Purview service. There’s even a procedure to hash the values on a system that is not connected to the internet so that you can be sure the actual values are not uploaded. The file with actual values can contain up to 100 million rows of sensitive data!
Create the EDM classifier
Now it’s time to dive in the Purview portal and put the data we’ve created in the first step to work. Navigate to ‘Data Classification’ and ‘Classifiers’. On the right hand side, let’s go for ‘EDM classifiers’. Click ‘Create EDM classifier’.
You’ll be greeted with a familiar screen that outlines the process. Click ‘Create EDM classifier’ en give your EDM Classifier a name and description.
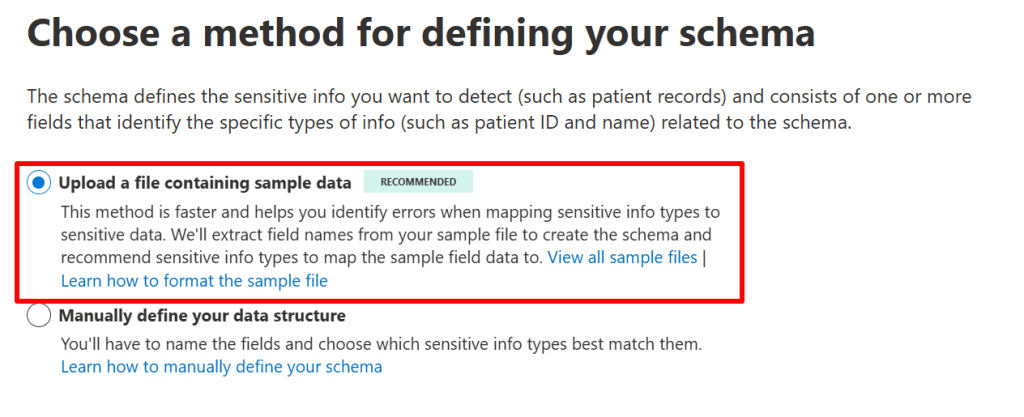
Next, we can choose 2 options. The first (recommended) one is to use our sample file to identity primary and secondary field names and create the schema for the EDM classifier. We also have to map the sample field data to a sensitive information type, which we’ll get a recommendation for. The second option is to manually define your data structure. I choose for the first (recommended) approach. Click next and upload your sample file, which is then processed by the service.
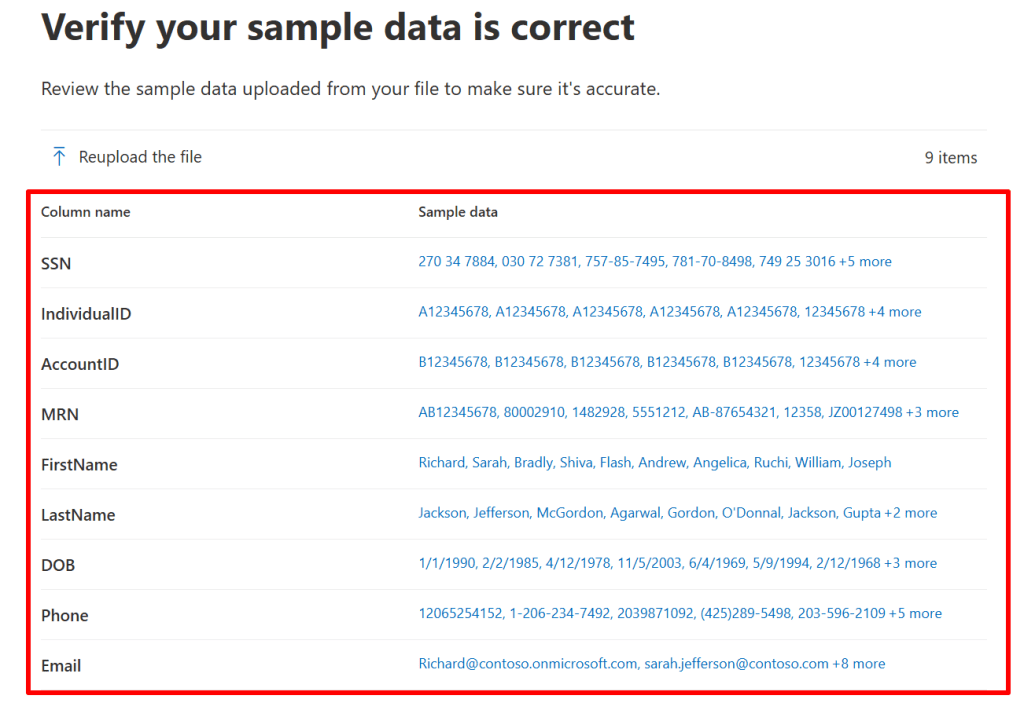
Once the processing is done, you’ll be presented with the columns that are identified and sample data inside those columns. I would like to stress here that you’ll walk through this process with sample (not actual) data because this data is not hashed offline before uploaded to the service! Click next.

Now for the cool part. The service takes a look at the data in the columns and recommends a SIT that would match the data in the column. In my case, the ‘Social Security Number’ (SSN) column matches the ‘US Social Security Number’ SIT. Because I know this is always a unique value in the data I provide, I select the SSN to be the primary element and click next.
In the next screen you can select whether data in the columns is case-sensitive or whether delimiters and punctuation should be ignored. Click Next.

Remember that we talked about that secondary elements should be in close proximity to the primary element? In our case the primary element is the Social Security Number (SSN). For the service to consider the match as a ‘high confidence level’, the primary value should be accompanied by 2 supporting (or secondary) elements within 300 characters.
For the service to consider the match as a ‘medium confidence level’, the primary value should be accompanied by 1 supporting (or secondary) element within 300 characters. If you want, you can change this configuration in this screen.
Select next, review your settings and click ‘Submit’.
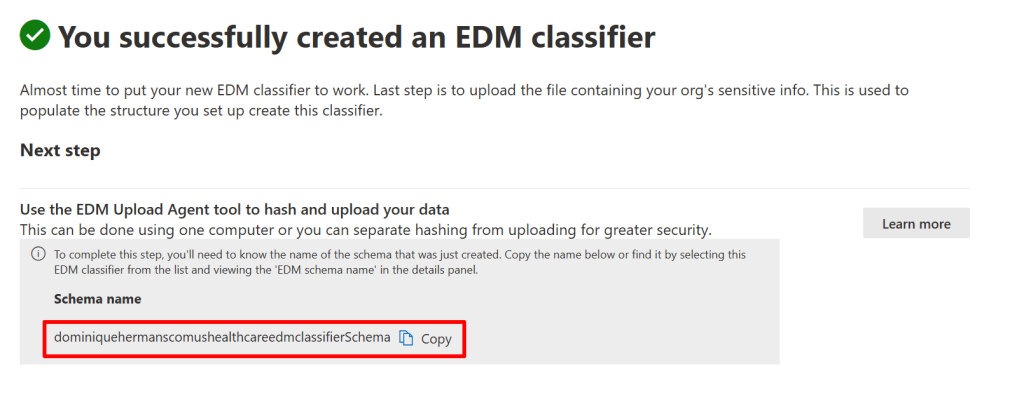
When done, the service reminds you that you now have to upload your sensitive data and tells you the schema name it generated. The schema holds the structure for the data you upload, consisting of columns, primary and secondary elements. Copy the schema name and finish the wizard.
So, to recap what we’ve done so far:
Created 2 tables (CSV format); 1 with sample data to set up our database schema, for which we configured the primary and secondary columns and matching SIT for the primary column. A second table containing the actual data in our environment. In a real world scenario, this data would have been extracted from a database for example and put in the CSV.
Securely upload the values in the table with sensitive data
Next we are going to securely upload the values in the table with sensitive data to Purview. We use a tool called the ‘EDM Upload Agent Tool’ to hash and upload the data. Like I told earlier, you could separate this process and hash the data on a non-internet connected system but for simplicity’s sake we use 1 system in this demo.
First, you make sure you meet all the prerequisites. Second, create a security group in your Microsoft 365 environment and name it ‘EDM_DataUploaders’. Add members of your organization that will be maintaining the database with sensitive information.
Next, download and install the EDM Upload Agent Tool from Microsoft Learn.

Start a cmd window as administrator and logon to your tenant using the ‘EdmUploadAgent.exe /Authorize’ command. Next, download the XML file that contains the schema we just created using the GUI by using the following command:
EdmUploadAgent.exe /SaveSchema /DataStoreName dominiquehermanscomushealthcareedmclassifierSchema /OutputDir C:\Users\Username\EDM\Next, we are running a check on our CSV file to see if it contains any characters that might be a problem. To do this, run the following command against your CSV File:
EdmUploadAgent.exe /ValidateData /DataFile US_Healthcare_ActualData.csv /Schema dominiquehermanscomushealthcareedmclassifierSchema.xmlThe command should return ‘passed the schema validation.’
Now let’s hash our sensitive data and upload it to the service by using the following command:
EdmUploadAgent.exe /UploadData /DataStoreName dominiquehermanscomushealthcareedmclassifierSchema /DataFile C:\Users\UserName\EDM\US_Healthcare_ActualData.csv /HashLocation C:\Users\UserName\EDM\Hash /Schema C:\Users\UserName\EDM\dominiquehermanscomushealthcareedmclassifierSchema.XML /AllowedBadLinesPercentage 0
Now when you run the ‘EdmUploadAgent.exe /GetDataStore’ command, you will receive a list of datastores and when the datastore was last updated.
Let’s Test!
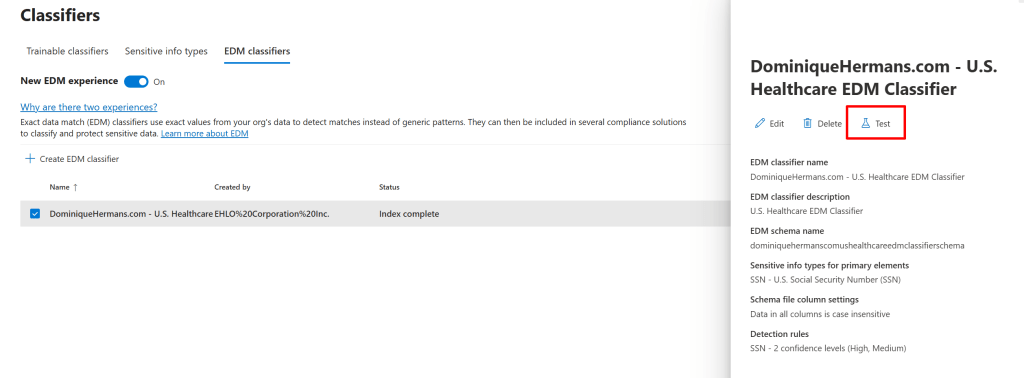
Now with our EDM Classifier in place and data uploaded, we can test our EDM classifier. To do this, navigate to ‘Data Classification’ and ‘Classifiers’. On the right hand side, let’s go for ‘EDM classifiers’. Select your newly created EDM classifier and select ‘Test’ at the right hand side.
Next, upload a document that you want to test against your EDM classifier. For this demo, I’ve cooked up a sample letter to one of my fictional patients.
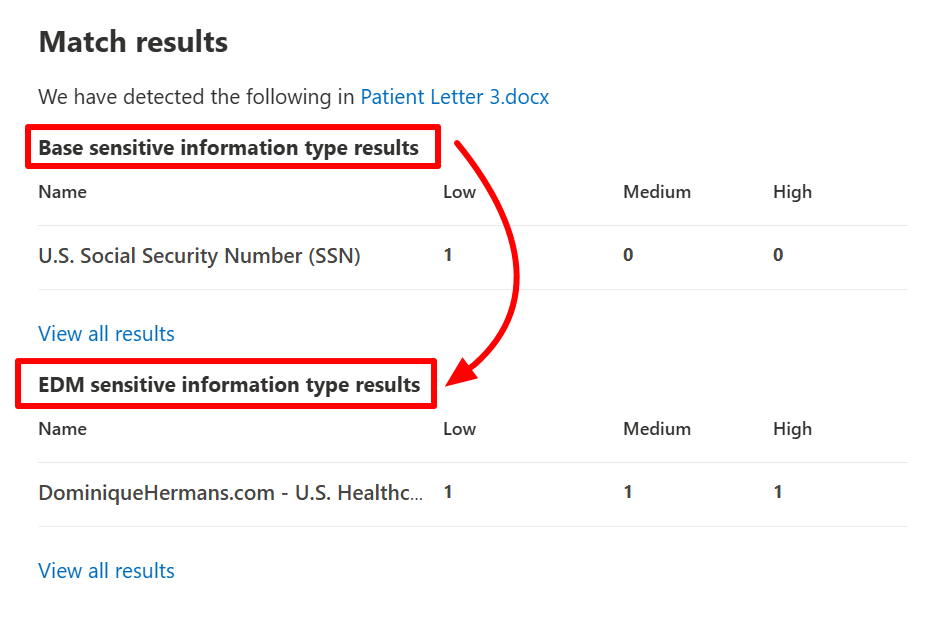
As you can see, the elements in the document are discovered by the SIT that’s attached to the primary element, and the EDM SIT itself!
Trainable Classifiers
Now let’s talk about the most extensive classification feature in Purview. Trainable classifiers. In short, they are custom built classifiers that can find (mostly unique) data that cannot be found by using other methods, like the ones we spoke about in this article.
They are configured in the following manner:
Navigate to Purview, data classification, classifiers, trainable classifiers and select ‘start scanning process’. The process will identify the content that you have in your organization. This process can take up to 14 days to complete!
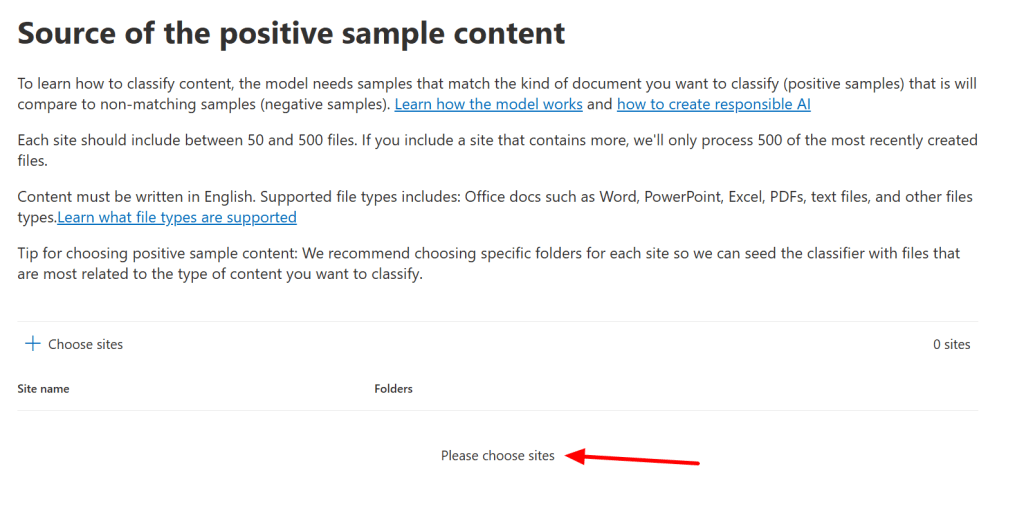
- Gather seed data (at least 50 samples/documents) and upload it to the trainable classifier using a SharePoint site. In this case the idiom ‘the more the merrier’ applies. The more samples you feed the trainable classifier, the more reliable it will be. The samples will then be processed by the service using Artificial Intelligence (AI) and Machine Learning (ML) techniques to identify similarities. This process can take up to 24 hours to complete. Note that you need at least 50 samples that are a strong match and at least 50 samples that are not a match.
- Now, when the first process is done, your trainable classifier has to be trained and tested. To do this, use a seperate SharePoint site in which you feed it with (at least 30, again, the more the merrier) test samples/documents. This should be positive, negative and somewhat vague items to train your classifier. After the service goes through it’s paces again, you will get the oppertunity to review the testdata from this step in the process. Once the accuracy score for your trainable classifier stabilizes, you have the option to publish the trainable classifier.
- You publish the Trainable classifier so it can be used in your policies.
Note that also in the case of Trainable Classifiers, Microsoft provides you with a list of pre-trained trainable classifiers that you can utilize!
Where can I apply all this goodness?
Now let’s talk about where we can use all of the classifiers we talked about in this blog.
- Sensitive Information Types (SIT’s): Data Loss Prevention, Sensitivity Labels, Retention Labels, Insider Risk Management, Communication Compliance, Auto-labeling policies, Microsoft Priva.
- Fingerprint Sensitive Information Types: Data Loss Prevention
- Exact Data Match Classifiers: DLP Policies, Auto-labeling policies, Microsoft Defender for Cloud Apps
- Trainable Classifiers: Auto-labeling Office files with sensitivity labels, auto-applying a retention label policy based on a condition, communication compliance, Data Loss Prevention.
Phew, this one got a little longer than I initially thought. But hey, if you made it to the end, you now know all about sensitive info types and classifiers! See you next time!

5 thoughts on “Microsoft Purview 101: Data Classifiers Explained”