Imagine you’re the guy in the picture above. You’re responsible for processing requests for information for a government. These requests occur worldwide and are often enshrined in legislation. Examples include:
- The Netherlands: Wet Open Overheid (WOO)
- United States of America: Freedom of Information Act (FOIA)
- Canada: Access to Information Act
- United Kingdom: Freedom of Information Act
These requests often need to be handled within a specified timeframe. Not exactly doable if you have to comb through al these boxes like the guy in the picture. Good thing in reality you are not really that guy in the picture! You use modern methods and services like Microsoft 365 to store your information. And that’s where the magic comes in that I will explain in this blog. With Microsoft 365 you can use the eDiscovery feature to fulfill the requests for information. A really handy and quick tool that takes a lot of the manual work out of your hands. Let’s see how this works by putting a request for information through it’s paces in eDiscovery Premium.
A quick note on licenses
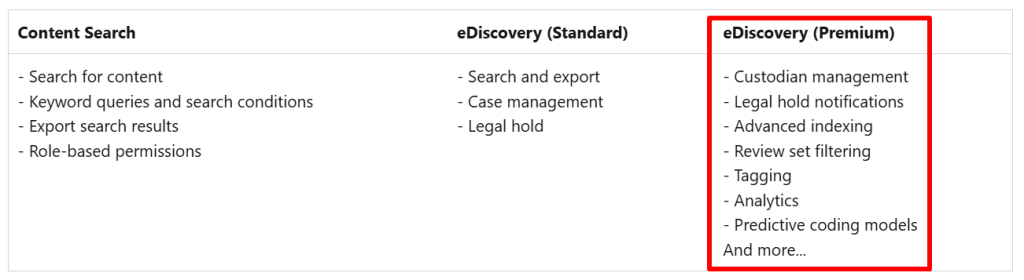
eDiscovery within Purview comes in 2 flavours: Standard and Premium. You can see the differences in the table above. There’s also Content Search which can be used for the same purposes but has less features in terms of case management. In this blog I will use eDiscovery Premium to demonstrate what features it has in store.
eDiscovery Roles
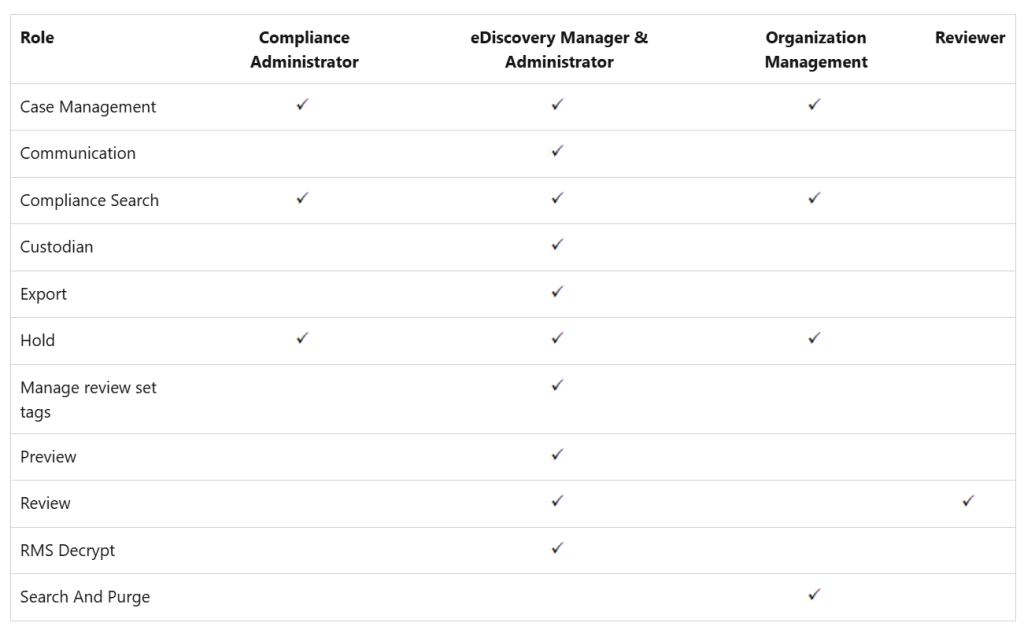
To get your work done in eDiscovery you have to be assigned roles. The easiest way to get this done is to add the account that you will be using for eDiscovery to one of the available role groups: eDiscovery Manager, eDiscovery Administrator, Compliance administrator, Organization Management or Reviewer. As you can see in the table above, the eDiscovery manager and administrator roles give you the most extensive permissions available.
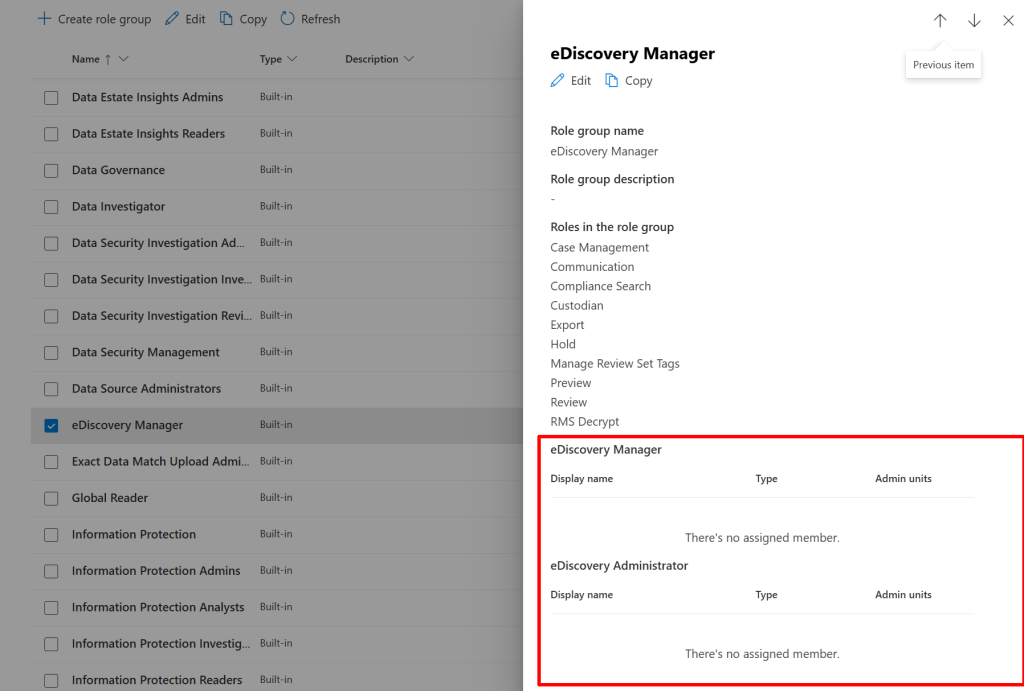
Both are present in the roles & scopes -> permissions section of Purview. However, they’re both available as a subgroup in parent role group ‘eDiscovery Manager’, as can be seen in the example above. Now, when navigating to eDiscovery, eDiscovery premium you can see the permissions that are assigned to you on the right hand of the screen.
eDiscovery Workflow
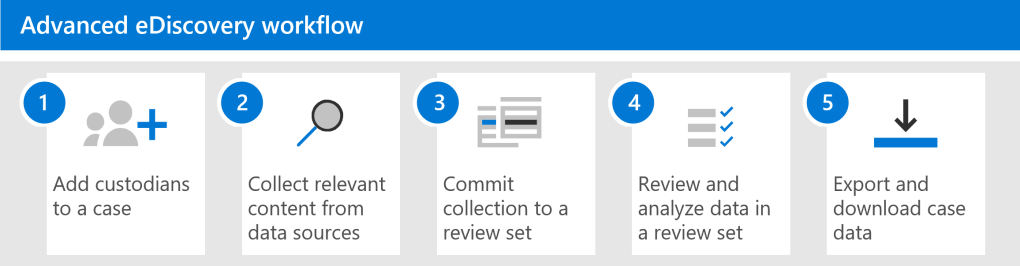
eDiscovery works with a workflow that helps you find the exact information that you need. Using this workflow, you will narrow down the volume of your data with each step, while making the results that remain at the end of the workflow as relevant as possible. Now that you are aware of the workflow we can dive in and take a look at what each step of the process looks like!
Create a case
Let’s start by creating a case. Navigate to the Purview portal, eDiscovery, eDiscovery premium and select the ‘cases’ tab. Click ‘Create a case’.
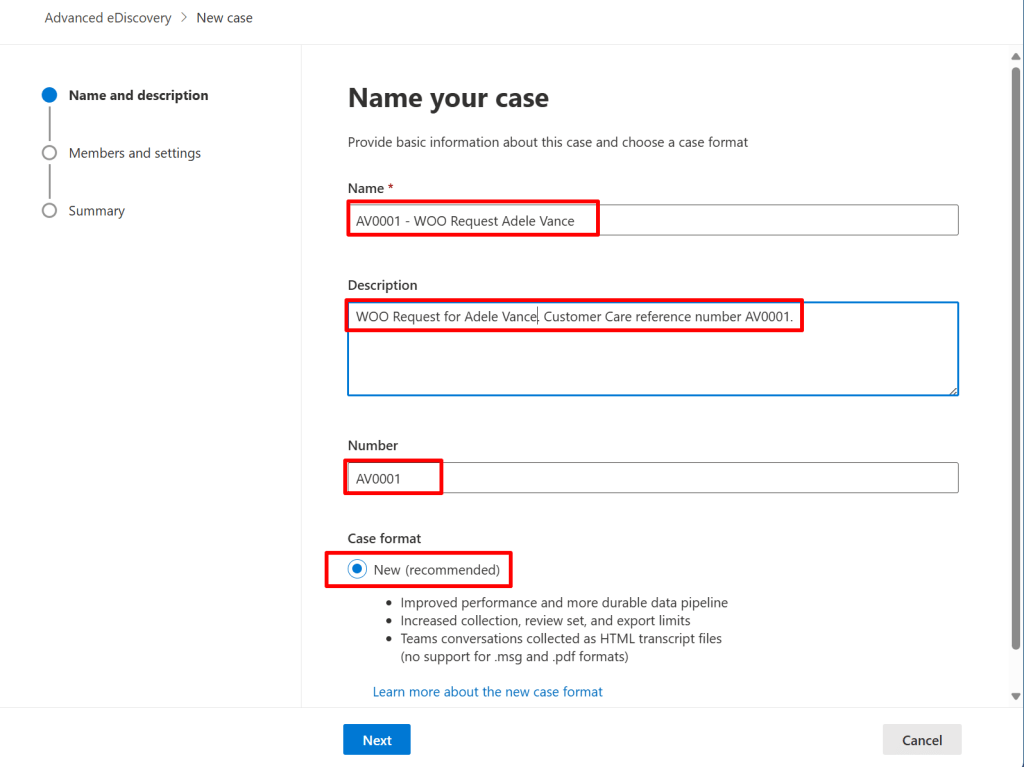
In the first screen, we have to create a name, description and Number for the case. The name and description speak for itself. The number can be any number that you can use as a reference to your customer management system for example. The new case format gives you more performance when having cases with a large number of items or a large size. Today, the old case format can not be used anymore. If you would like to have more information on the benefits of the new format, take a look at this Microsoft learn page.
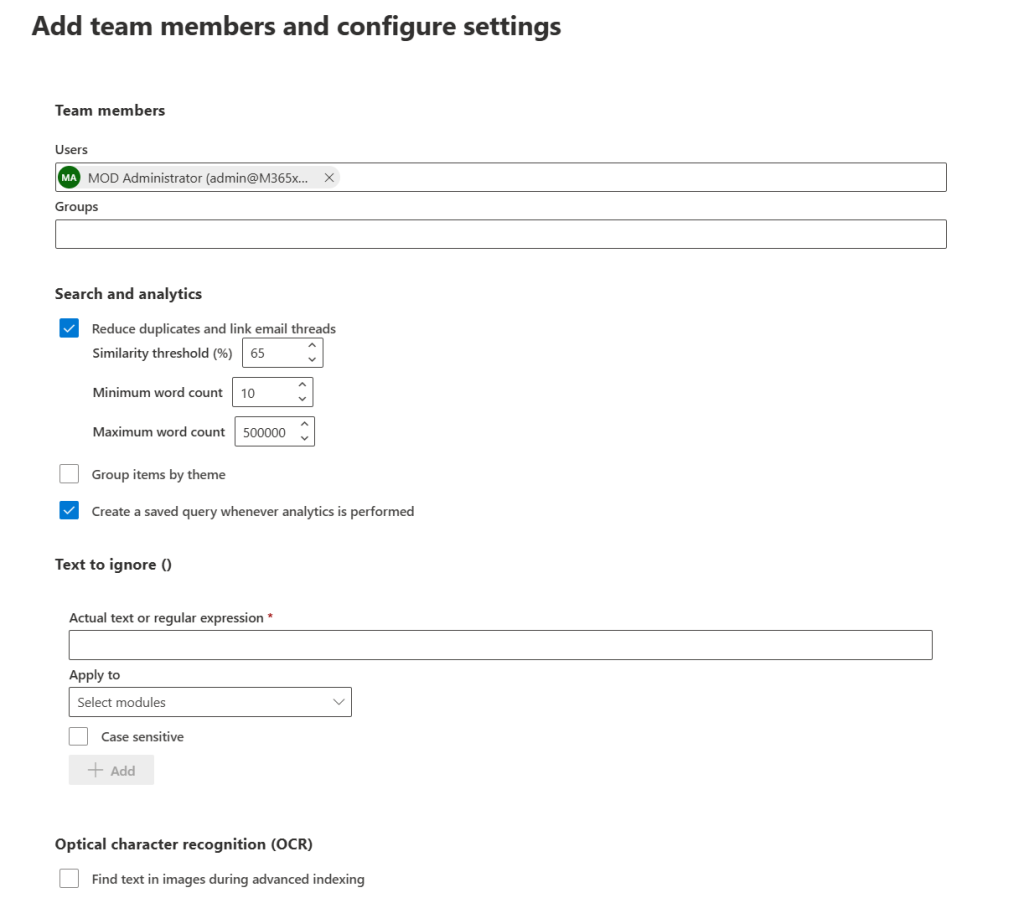
In the next screen, add your team members. These team members will investigate this case. Be sure to grant this members the correct eDiscovery permissions, as without them, they cannot access the correct parts of eDiscovery. Team members can be added as individuals or as groups.
We can also configure the search and analytics features here like reducing duplicates in the information that is found or linking email threads. The parameters for these features can be altered here, or when the case is created. Also, items can be grouped by theme and your search query can be saved.
If you have certain items with text you want to ignore, you can add them here. This actual text or regex can be applied to near-duplicates, email threads or themes and can be configured as case sensitive if you prefer.
Lastly, you can enable optical character recognition to find the text you specify in images.
Note that the actual search query is not defined in this screens. For this, we will configure a collection later.
Add Custodian(s)
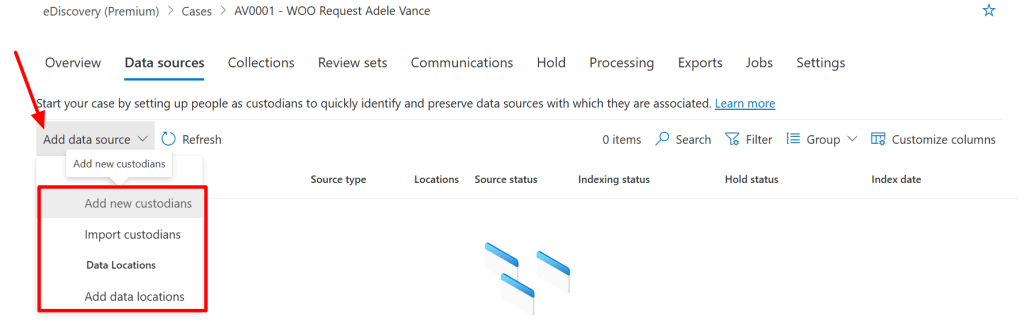
Now that our case is created we have to add data sources. Data sources can be of one of two types:
- Custodial data sources: a custodian is someone who has access to a piece of information that might be relevant to this case. This piece of information can be an email, document, Teams group, SharePoint site or other type of information.
- Data Locations: A data location is a location that has data that isn’t tied to a person but can be relevant to your case. This is also called a non-custodial data source.
Both data types above are indexed by a process called advanced indexing. This process optimizes searching for it in the next step.
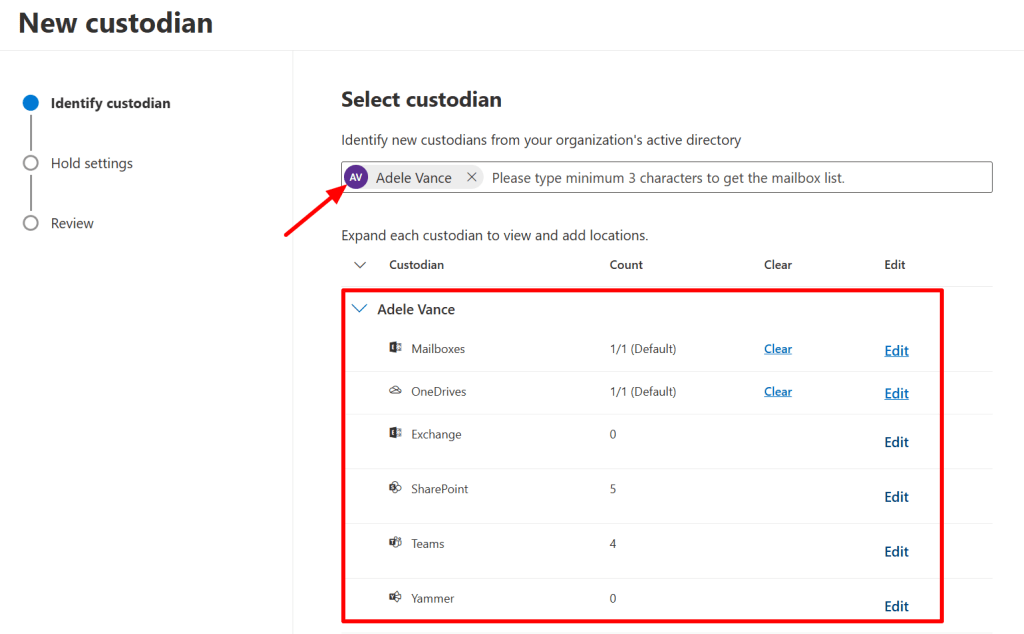
In this demonstration, I add Adele Vance as a custodian and map her mailbox, OneDrive and various SharePoint sites and Teams groups to be linked to her as a custodian.
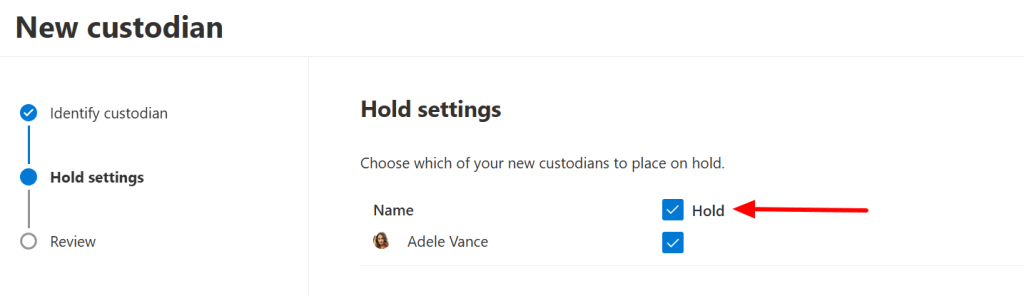
In the next step, I can choose to place this data on hold. This preserves the data and makes sure it can’t be deleted by the user or anyone else because we need it in our case.
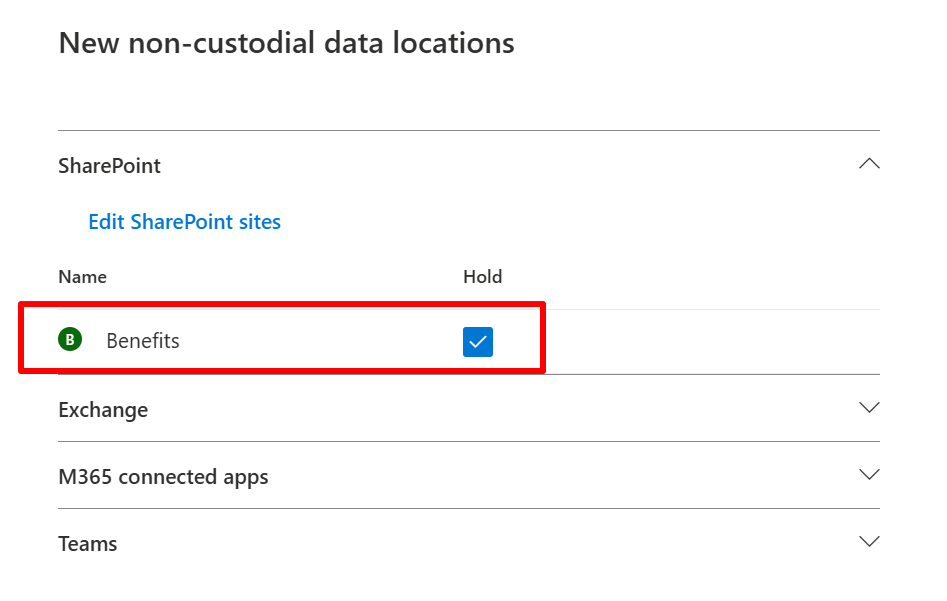
For completeness I also added the ‘Benefits’ SharePoint site as a data source that isn’t tied to a custodian and also place this location on hold.
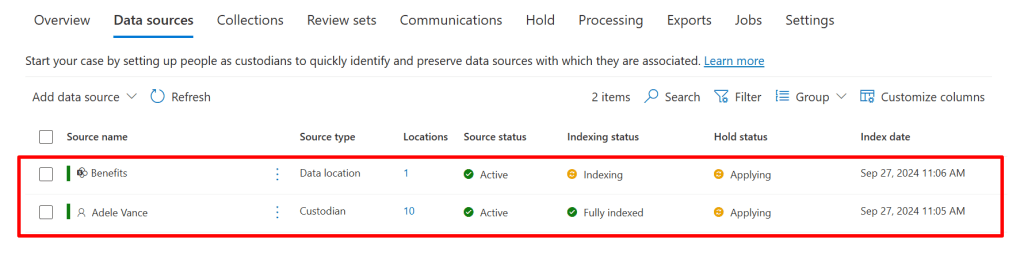
When this is done the system goes through it’s paces to index the sources and apply the holds.
Create a collection
Now indexing is complete and holds have been applied, let’s move to the ‘collections’ tab. The creation of a collection allows you to build search queries to fetch the information you need from the data sources you added to the case. As with most wizards, let’s start by specifying a name and description for the collection. Next, we have to select the custodial and non-custodial data sources that we want to use in this collection. As this is just a simple case, we select each custodial and non-custodial data source that’s created and include all services to be included. In a real-world scenario, you would use collections to narrow down your search result.
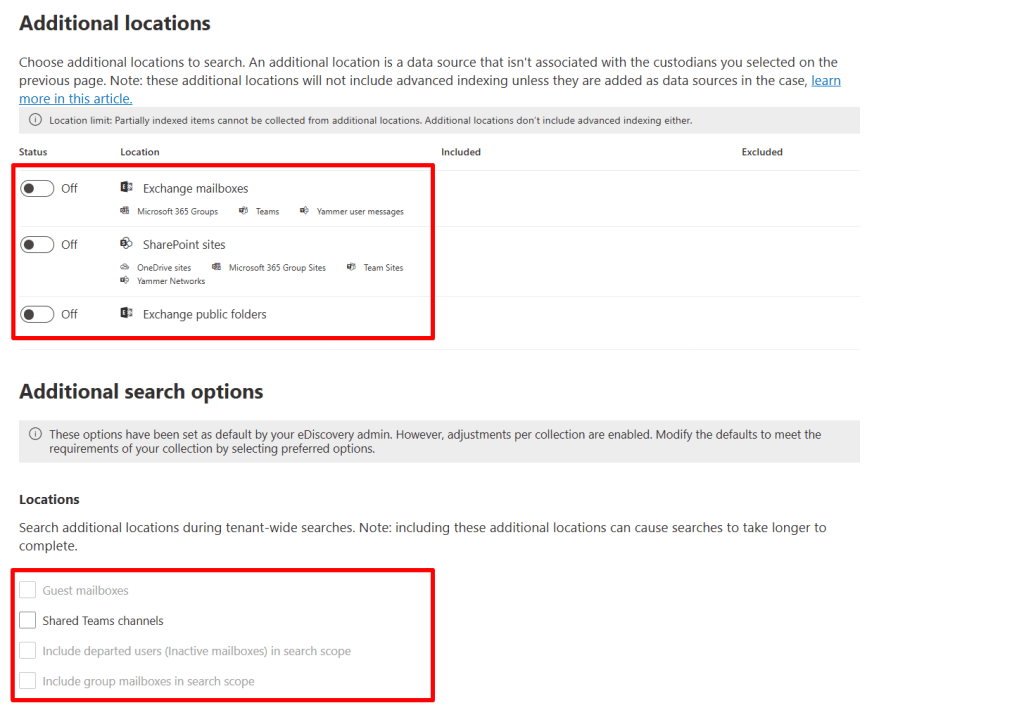
On the next page, you can specify additional locations to be included in your collection. It’s good to be aware of the fact that the locations or search options selected here will not be indexed by the advanced index process!

Now we arrive on the page where we can construct our query that actually will fetch the data we are searching for. You’ll have the option to do this with the query builder or by using the KQL editor. I opted to go for a simple query i drafted up with the query builder. It will search for Adele as the sender OR adele vance, adele or vance as keywords in items. In a production environment, this is where serious thought goes into creating your query to be able to fetch the right information.

Once again, the system starts running to fetch the information you requested from the data sources that where specified earlier! When the search is complete you can click the collection and take a look at the statistics of the data found. Now you can edit your query to better match your needs or when you’re happy with the end result, you can commit the collection to a review set by selecting the collection and pressing ‘commit collection’.

When you commit a collection, the data that is found using the query is copied to a secure Azure Storage location. When the data is arrived at that destination, it is indexed again so you are provided with fast search results when looking at the items in your review set.
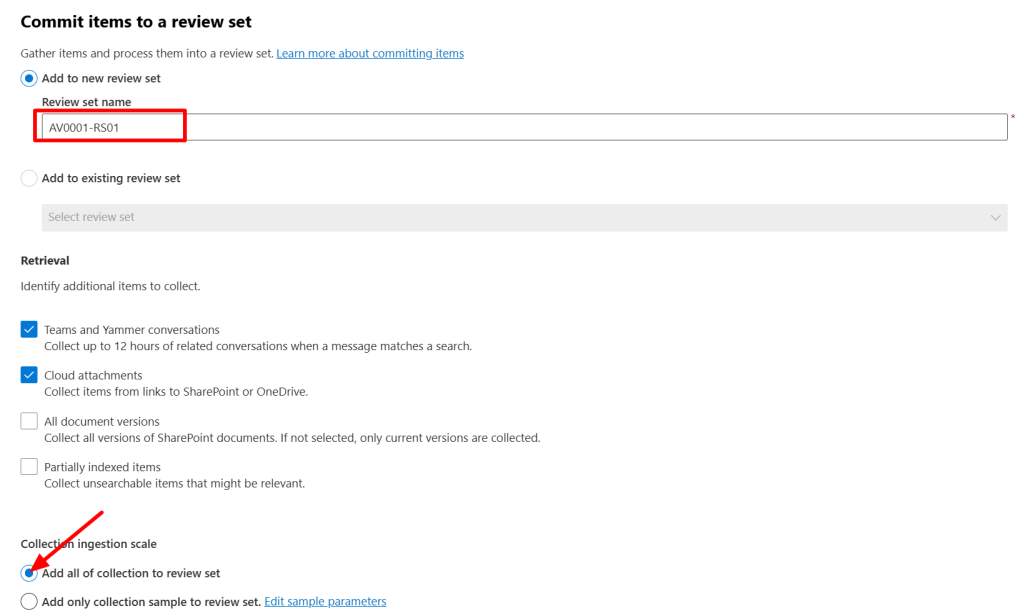
When committing the items to a review set, you have to specify a name for the set and choose if you would like the retrieve additional items like Teams and Yammer messages, cloud attachments by following links to SharePoint or OneDrive or by including all document versions or partially indexed items.
Lastly, you can choose to add all of your collection to the review set or use a collection sample. This sample can consist of documents based on a confidence level or a random sample size which you can specify.
Review your review set
When your data is comitted to the review set, you can select the ‘review sets’ tab to see it. Select your review set and select ‘open review set’. Let’s see what we can do with our review set.
Overview

In the overview pane, we can set (and save) filters to further narrow down the list of documents in this review set (1). We can also see the list of all files in this review set (2) and even take a look at the document content in the preview pane (3).
The first button provides you with an overview of the current review set, which includes the total extracted documents, total processed items and total number of failed extracted documents. It also shows you how many load sets are in this review set. A load set is a given number of documents that are added to a review set at a single time.
Analytics
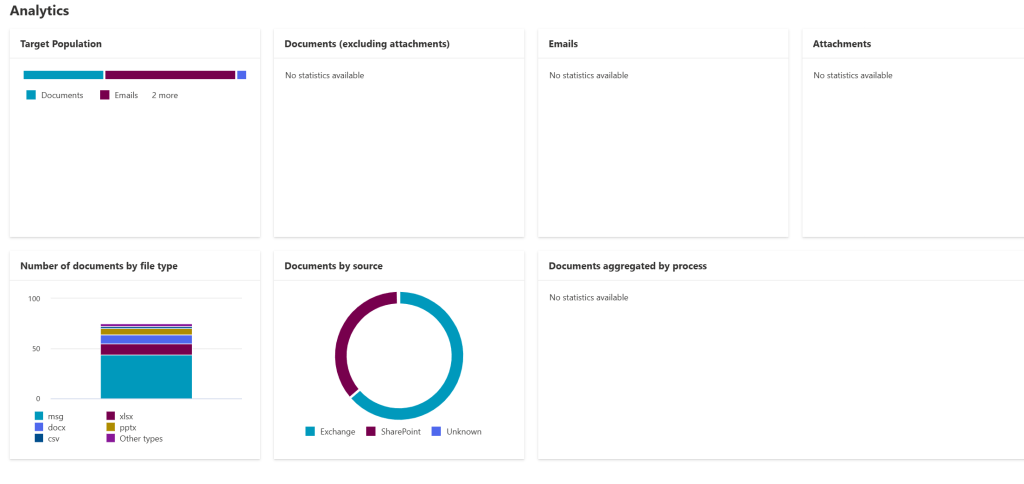
The second button allows you to run document and email analytics which in turn provide you with some nice analytics as can be seen in the image above.
Document Review
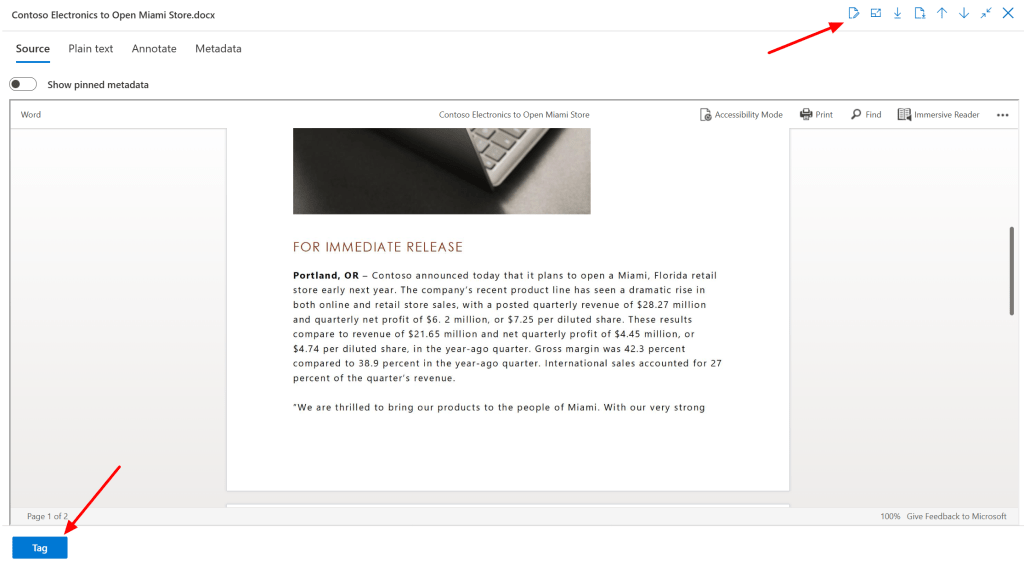
Now when we select a document there’s a couple of things we can do that help us in the review process. Let’s start with the button on the lower left. This provides us with a tagging option to provide the document with a tag. This tag can be part of a tag group that you can use within other documents as well and you can use them in search queries. We can also add notes, download the original file or pdf. It’s even possible to take a look at the metadata or plain text version of the files!
Take a look at the video above to see the annotation possibilities in action, really cool stuff if you ask me. Select actions, commit redactions to pdf to save them when you are done. You can also use the same menu to add documents to another review set. Another powerful tool in this menu is the ability to group documents by conversations/related items or by families. If you want to know more about this, see the following Microsoft Learn article.

When you are done with reviewing all the files, there are several ways to export the information for further review by third parties. You can do this by downloading the documents in source or pdf (containing annotations) format, but it’s also possible to export a selection or all documents in bulk. This contains the metadata, native files, text files, and redacted documents that have been saved to a PDF file. You can do this by selecting the files and pressing ‘export’.
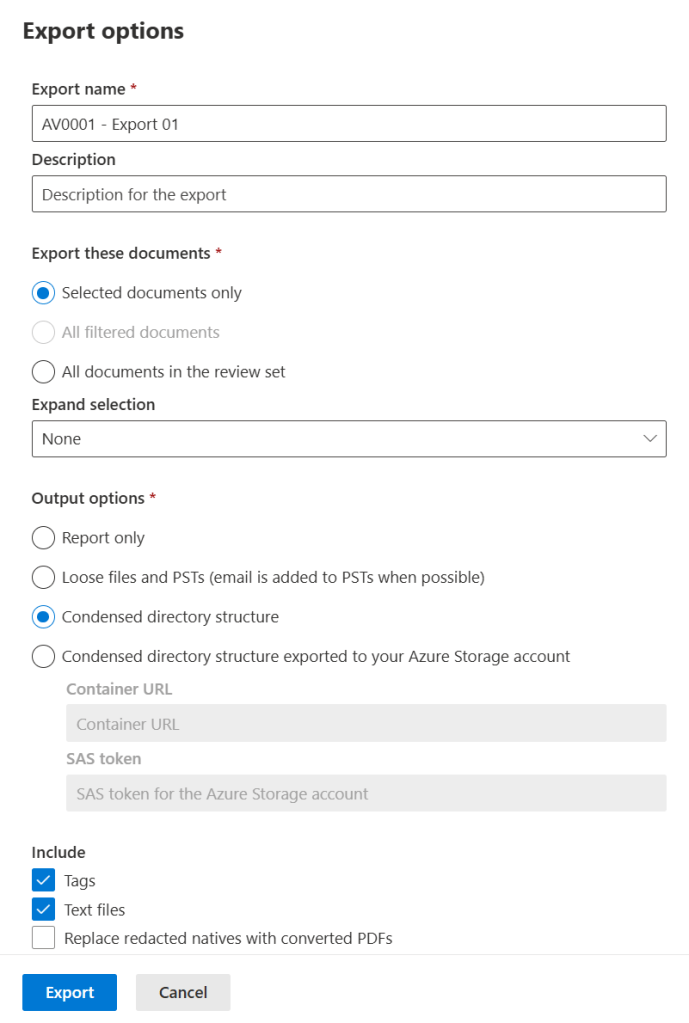
To conclude this article, let’s take a look at the options we have here. We can provide a name and description for the export and select which documents we want. (Selected, all filtered, all documents in the review set). This selection can be expanded by using family groups or conversation groups if you have these created.
The output options at our disposal are really nice to, we can only export a report, loose files and PST’s or a condensed directory structure which you can download directly to your pc or to your Azure Storage Account. I also opted to include Tags, text files and to replace redacted natives with converted PDF’s (not shown in image).
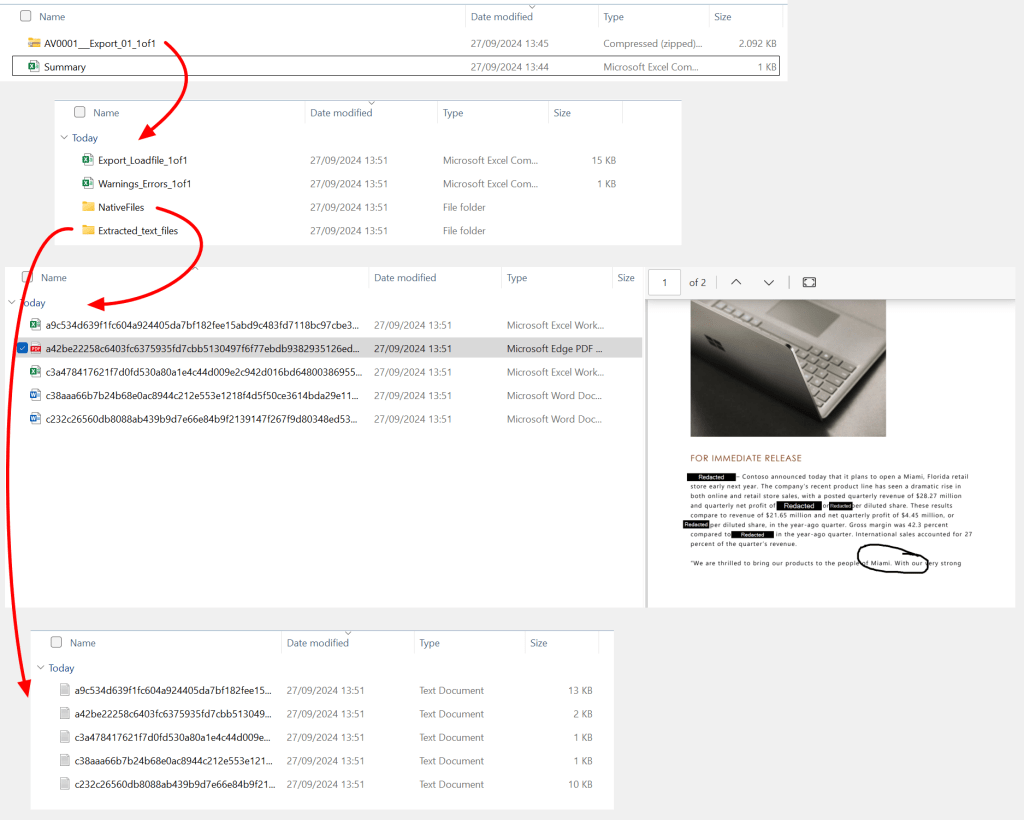
The output is displayed above.
With this article, we scratched the surface of the possibilities of eDiscovery in Microsoft Purview. In future blogs we will be digging deeper for you to unlock the full potential of this tool. Have a nice day!

2 thoughts on “Microsoft Purview 101: How to use eDiscovery Premium to comply with requests for information”