In the previous blog post in this series we introduced the ‘Protect Your Microsoft 365 Data in the Age of AI’ series, Data Security Posture Management for AI (DSPM4AI) and the fictional company that we will use to explain all the goodness Purview and other Microsoft 365 solutions have in store to help us address the concerns that we talk about in the first post.
Up to now, the ‘Protect Your Microsoft 365 Data in the Age of AI’ series consists of the following posts:
- Protect your Microsoft 365 data in the age of AI: Introduction
- Protect your Microsoft 365 data in the age of AI: Prerequisites (This post)
In the second post in the series, we will be taking a look at the prerequisites that we need to configure in order to make use of Microsoft Purview Data Security Posture Management for AI, Microsoft Defender for Endpoint and Microsoft Defender for Cloud Apps to meet our needs. If we add other Microsoft 365 solutions in this series, this blog post will be updated.
Prerequisites: Data Security Posture Management for AI

When navigating to the DSPM4AI solution in Microsoft Purview, we are greeted with a nice list of prerequisites we need to set up to get started.
Activate Microsoft Purview Audit
Nowadays, Purview Audit is enabled by default as you can see in the ‘get started’ list above. Should you have an older tenant where Audit is disabled by default or if you have disabled audit yourself, you should enable it first to make use of DSPM4AI.
You can do so by simply clicking the link which takes you to the Purview Audit solution where you can enable auditing. Do note that it can take up to 24 hours before auditing is enabled for your tenant.
The reason why we need auditing enabled is that a lot of information that is provided through the DSPM4AI dashboards is sourced from the audit log. An example of an entry in the audit log is for example interaction users have with Copilot and agents.
Install the Microsoft Purview Browser Extension
To capture risky browser-based user activity and get insights into user interactions with other (Non-Copilot or Copilot Agents) generative AI apps, a browser extension has to be installed as these interactions are not added to the audit log.

The browser extension can be installed from the Microsoft Edge Add-ons store.
Note that the browser extension is also needed if you use Microsoft Edge as your company browser. While an extension is not needed in Edge for Endpoint DLP, DSPM4AI also makes use of the Insider Risk Management solution, which does need the extension installed. Should you use Google Chrome or Mozilla Firefox as your company browser, note that there’s also an extension provided for those. You can find the extensions and instructions on how to distribute them using Microsoft Intune or Group Policy at Microsoft Learn.
Also, be sure to keep in mind that when you provide your users with a company browser that has the Purview extension installed, you should keep your users from installing or using other browsers as information will not be send to Microsoft Purview in those browsers nor will you be able to apply policies. If you would like to know more about this, Peter van der Woude has an excellent post written about this subject.
Onboard Devices to Microsoft Purview
To be able for the Purview cloud service to communicate with endpoints, they have to be onboarded to Microsoft Purview. This functionality is needed for endpoint data loss prevention and insider risk management.
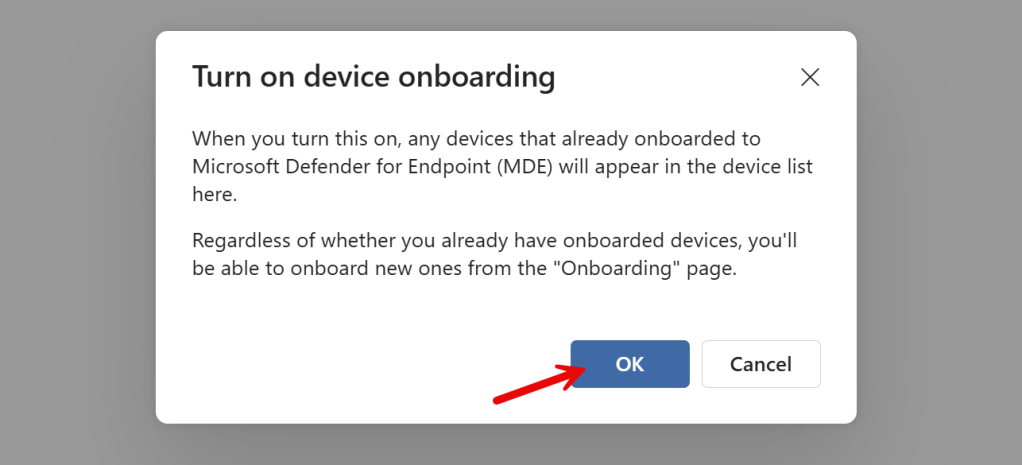
The endpoint Purview component that enables this communication is part of the Microsoft Defender for Endpoint (MDE) agent. Note that you don’t have to actively use MDE to be able to use the Purview agent. However, if you already enrolled your clients in MDE, they will also automatically be imported to Microsoft Purview. Previously you needed a separate agent to enable this communication.
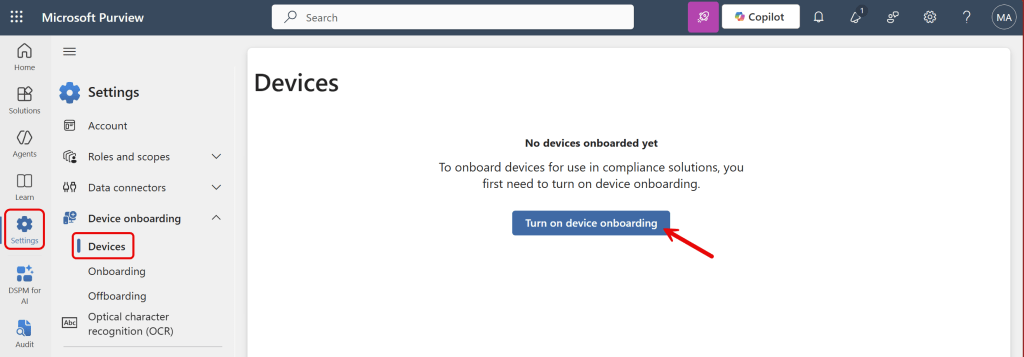
To enable device onboarding, navigate to settings, device onboarding, devices. Click ‘Turn on device onboarding’.
Now, when your clients are already setup to use MDE, a list of your clients automatically appears here. If not, just follow along!
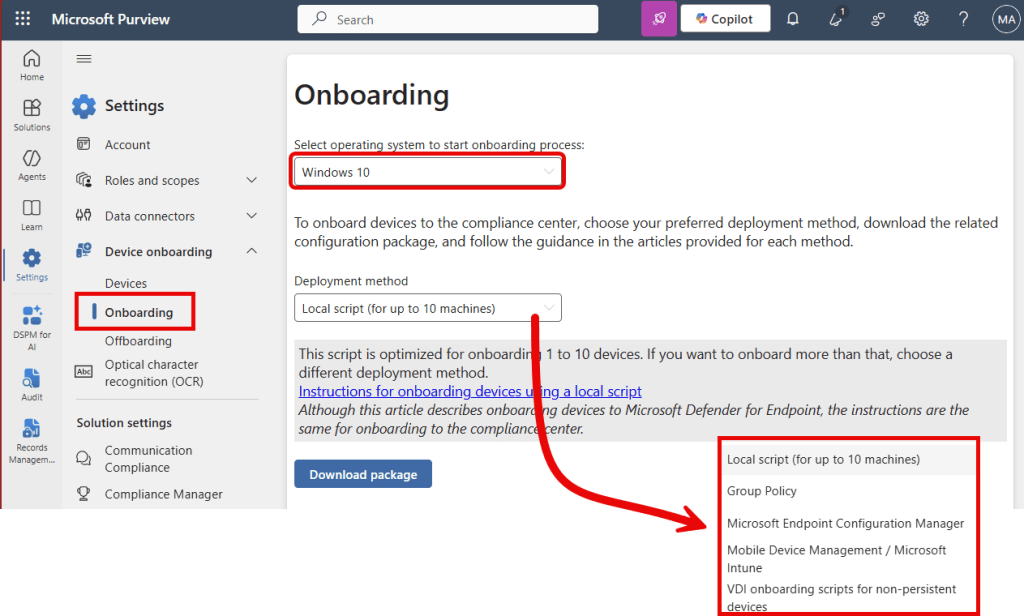
Navigate to the ‘onboarding’ page. Here you can find various methods and Microsoft Learn articles that get you up to speed on how to enable the Purview component of the MDE agent on Windows and MacOS. As you can see, there’s a local script (which I advise to only use for testing purposes) and more robust methods like leveraging Group Policy or Intune.
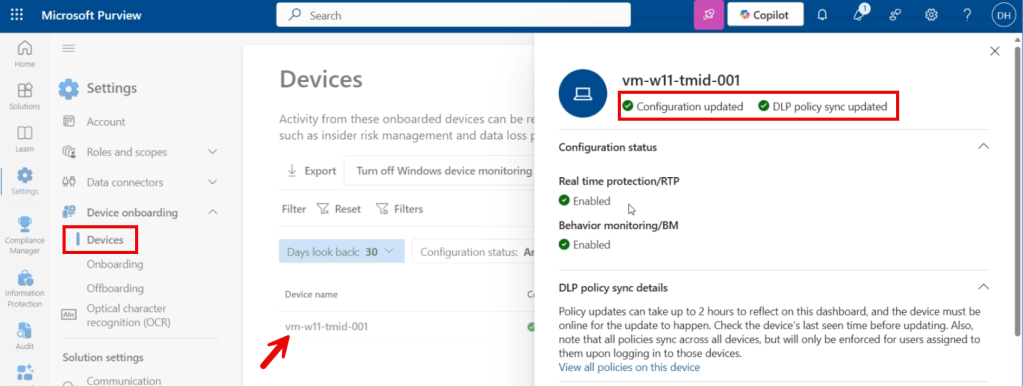
After onboarding your devices, you’ll find them in the devices pane. For each device, you can check whether it’s configuration is updated and whether the latest DLP policies have been synced with the device.
The configuration status shows:
- If the device is configured correctly
- If the device is sending a heartbeat signal to Purview
- The last time the configuration was validated
- Status of Microsoft Defender Antivirus Always-On protection and behavior monitoring (Windows Only)
Note: to be able to onboard devices to Microsoft Purview, your devices should be:
- Microsoft Entra (hybrid) joined or Microsoft Entra registered.
- Your antimalware client version should be 4.18.2110 or newer.
- Installed Microsoft 365 apps should be on version 16.0.14701.0 or later.
Prerequisites: Microsoft Defender for Endpoint and Microsoft Defender for Cloud Apps
Microsoft Defender for Cloud Apps (MDCA) can be used to provide you with an insight on (SaaS) app usage (or shadow IT if you will) in your organization. The information to provide you with such insight can be sourced from one of the following options:
- Integrate Microsoft Defender for Endpoint with Microsoft Defender for Cloud Apps so Defender for Endpoint logs are used.
- Collect and (automatically or manually) upload logs from an in-line network device. This could be, for example, a firewall.
In this post, we will be configuring the integration between Microsoft Defender for Cloud Apps (MDCA) and Microsoft Defender for Endpoint (MDE). This will give us the added benefit that we can use the Endpoint Network Protection capabilities within MDE to block traffic to certain websites. I will explain more on this in a later post in this series. In this post, we are going to take a look at the configuration that needs to take place to make this integration happen.
Onboard devices to Microsoft Defender for Endpoint
First, let’s onboard our devices to MDE. To do this, navigate to the Microsoft Defender admin portal (security.microsoft.com) and make your way to settings, endpoints, device management, onboarding.
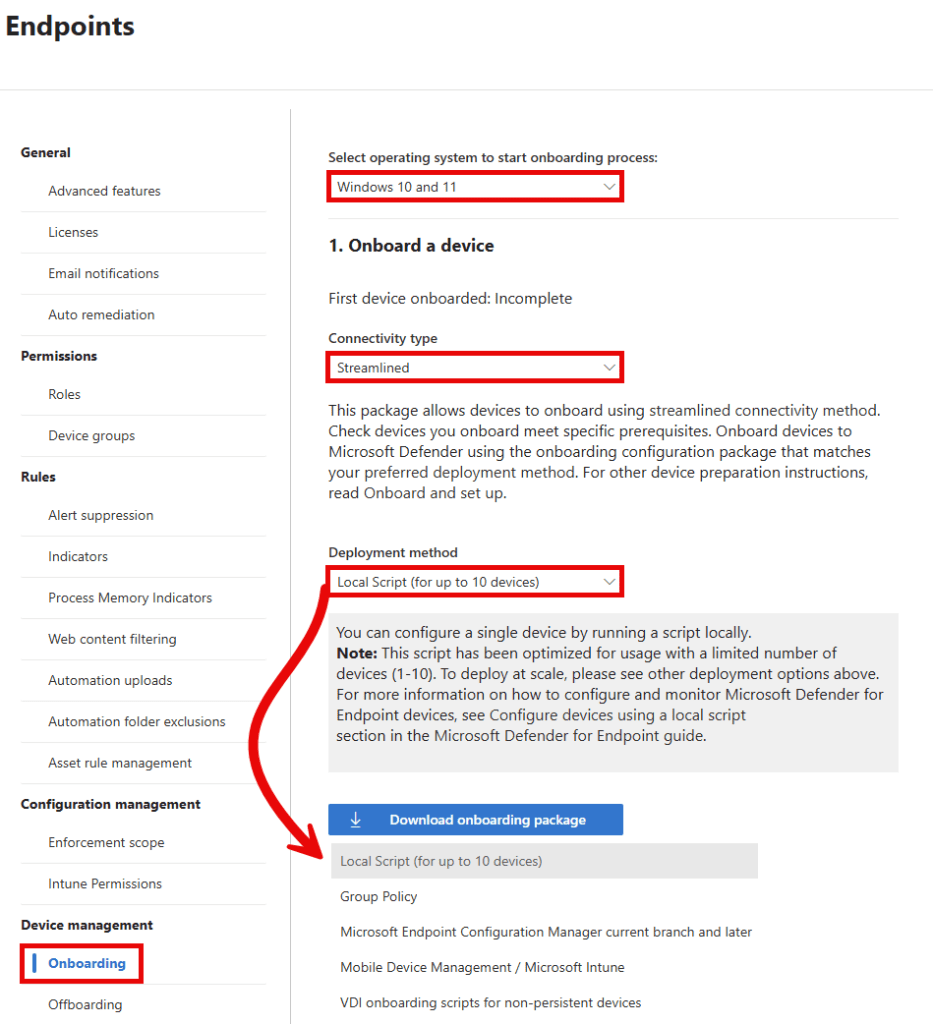
As with onboarding endpoints to Microsoft Purview, we have kind of the same experience when onboarding devices to MDE. First, select your operating system. For deployment method I would recommend choosing the ‘streamlined’ connectivity type. There’s no difference in functionality in MDE. Connectivity type ‘streamlined’ will only change the URL or IPs that a device uses to a reduced URL set and ip ranges to connect to the MDE service. If you would like to have more information on this, be sure to check out this Microsoft Learn article.
As you can also see in the image above, we can select enterprise-grade onboarding options like Group Policy, Microsoft Endpoint Configuration Manager, VDI scripts or Microsoft Intune. For this demo however, we are going to use the local script.
Select ‘Download onboarding package’ and extract the zip file on your Windows 11 endpoint. Next up, run the WindowsDefenderATPLocalOnboardingScript.cmd file in an elevated command prompt to onboard your device to MDE.
Run a detection test
If this is your first onboarded device for MDE, I would recommend to run a detection test to check whether communication with the MDE cloud service is working properly. You can do so by starting a command prompt and entering the following command:
powershell.exe -NoExit -ExecutionPolicy Bypass -WindowStyle Hidden $ErrorActionPreference= 'silentlycontinue';(New-Object System.Net.WebClient).DownloadFile('http://127.0.0.1/1.exe', 'C:\\test-WDATP-test\\invoice.exe');Start-Process 'C:\\test-WDATP-test\\invoice.exe'
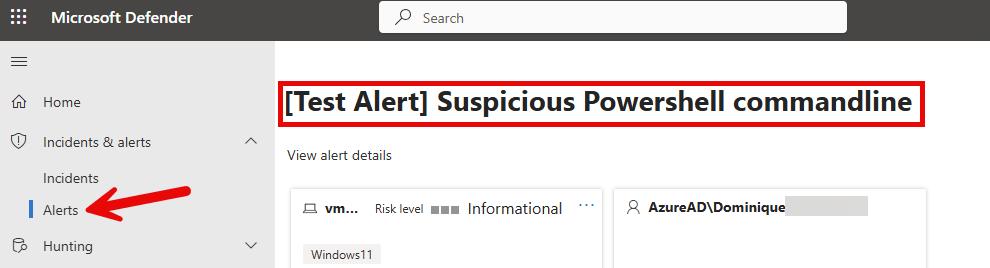
If the test is marked as completed close the window and head over to the Microsoft Defender admin portal (security.microsoft.com), Incidents and alerts, alerts. If you can see the Test Alert mentioned here, your device has successfully caught a suspicious powershell (test) command and created an alert in the Defender portal.

When navigating back to settings, endpoints, Device management, onboarding, you can see that ‘First device onboarded’ and ‘First device detection test’ now both show ‘Completed’.
Enable the integration between Microsoft Defender for Endpoint and Microsoft Defender for Cloud Apps
With the initial MDE setup done, let’s move on to integrate MDE with MDCA.
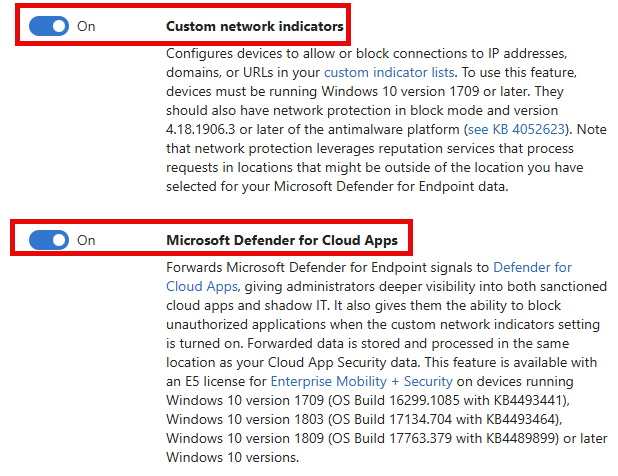
First, head over to the Microsoft Defender admin portal (security.microsoft.com), Settings, Endpoints, General, Advanced Features. Here you should enable 2 settings:
- Custom Network Indicators: Configures your endpoints to allow or block connections based on your custom indicator list. This list can be filled by your organization manually. In our case we are leveraging MDCA to configure this for us. This is where the next setting comes into play.
- Microsoft Defender for Cloud Apps: Configures MDE Signal forwarding to the MDCA service. This allows MDCA to fill the Custom Network Indicators block list with URL’s from MDCA.
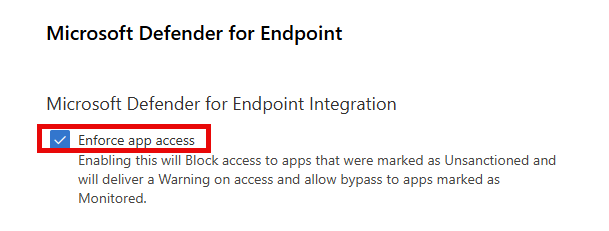
Next, navigate to Settings, Cloud Apps, Cloud Discovery, Microsoft Defender for Endpoint and enable the ‘Enforce app access’ setting. This setting allows apps that are configured in MDCA as unsanctioned (unallowed) to be blocked or to be blocked with the possibility for the user to override the block.
Depending on the browser used, MDE can leverage this functionality in 1 of 2 ways:
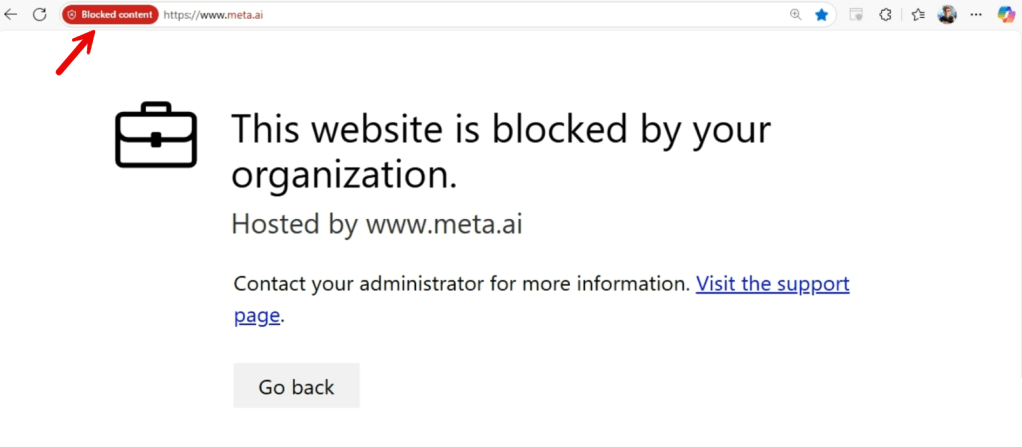
1. Using the SmartScreen filter in Microsoft Edge for example. This provides you with the most user-friendly experience as the end-user sees the website cannot be reached because it is blocked by the organization and has the option to visit a (custom) support page that provides more information.

2. Using the Network Filter in MDE. This option is used when the browser does not have a SmartScreen filter and does the job, but has a somewhat limited user experience.

Last but not least, the Network Protection feature should be enabled on your endpoint by leveraging the following PowerShell command:
Set-MpPreference -EnableNetworkProtection Enabled
All right, we are all set and have met the prerequisites to start configuring Microsoft Purview, Microsoft Defender for Endpoint and Microsoft Defender for Cloud Apps to meet our needs!

6 thoughts on “Protect your Microsoft 365 data in the age of AI: Prerequisites”