For all your labeling needs on Windows clients, Microsoft provides us with the Microsoft Purview Information Protection (MPIP) client. This client extends the use of sensitivity labels in your organization for use on Windows clients. Your files can be anywhere on the client, it doesn’t have to be in a SharePoint, Teams or OneDrive location, it can just as easily be on the local harddrive.
The Microsoft Purview Information Protection client is in fact a collection of 4 tools:
- The information protection file labeler. This tool is featured in this blog article. I will show you how to label files with it.
- The information protection viewer which can be used to view encrypted files. This tool is also featured in this blog article.
- The information protection scanner. Used to scan network shares and apply labels as per your liking. Will be featured in the next blog article.
- The Microsoft Purview Information Protection PowerShell Module. Used to install and configure the information protection scanner and adjust sensitivity labels on files. Also featured in the next blog article.
The MPIP Client replaces the old Azure Information Protection (AIP) unified labeling client. Be sure that you don’t rely on AIP before installing the MPIP client as it will uninstall the AIP client! This client also won’t install add-ins for sensitivity labeling in Office applications, as this is built-in the applications nowadays.
Before starting, make sure to take a look at the client requirements. If you run clients on Windows 11 ARM, make sure to check the note that this processor architecture is not supported. While it worked as designed in my lab environment, your mileage may vary. Also, the tool supports all languages that are supported by Office 365.
File type support
The MPIP client supports even more file types (extensions) than the ones found in the Microsoft 365 services. Support for all Office filetypes, PDF, Images, Photoshop and others are present. You can check the entire list at Microsoft Learn. Make sure to note that the supported file types differ between sensitivity labels with encryption and sensitivity labels without encryption.
Installation
Download the client from the Microsoft Download Center and execute the downloaded EXE or MSI file.
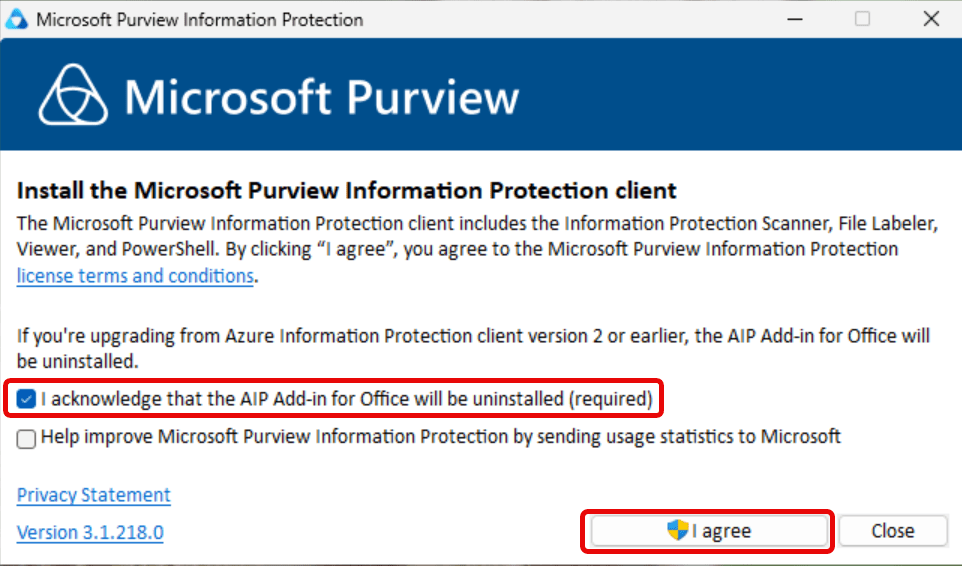
As noted earlier, take note of the fact that the AIP add-In for Office will be uninstalled. After installation we can immediately start labeling files!
Labeling files

Right-click a supported file, choose ‘Show more options’ and go for ‘Apply sensitivity label with Microsoft Purview’.
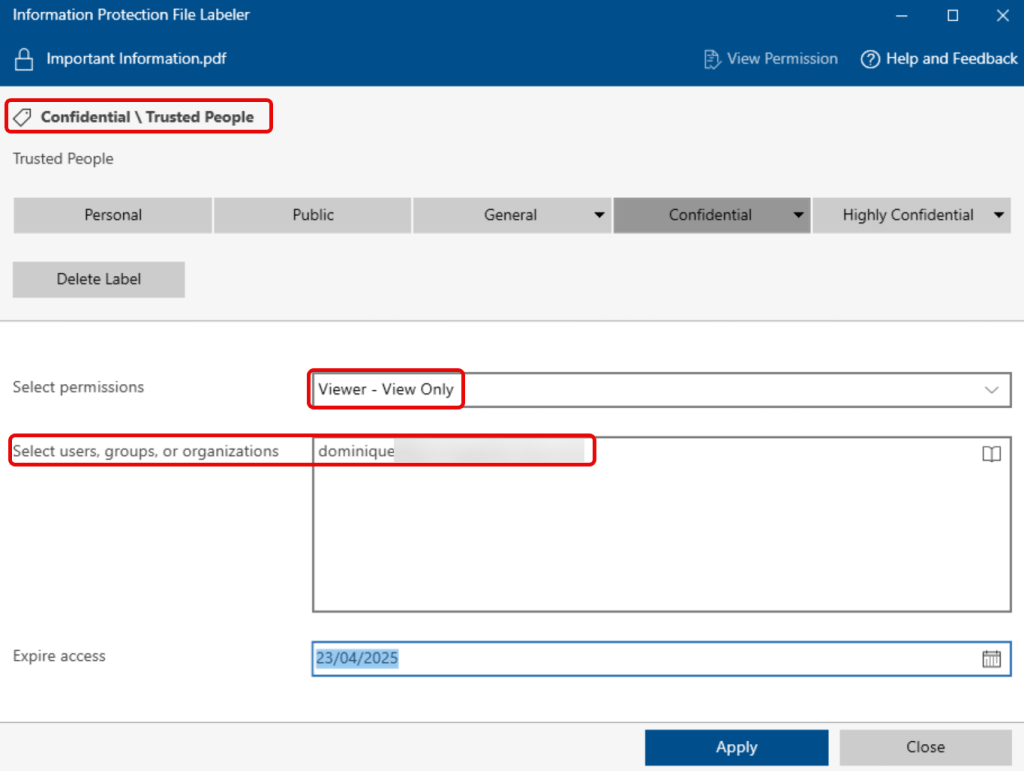
The MPIP client opens and shows all sensitivity labels that are distributed to you by your organization. In this example, I choose to go with the ‘Confidential \ Trusted People’ sensitivity label, which is configured to select permissions and targeted users, groups or organizations manually. I’ll include 1 user and give this user ‘dominique’ only viewer permissions.
Viewing protected files
Using the MPIP client, I can also apply a sensitivity label and protection to PDF documents. Let’s see what happens after a PDF file called ‘Important Information’ gets shared with an external user that only has viewer permissions:

After opening the file in Microsoft Edge and clicking ‘file permissions’, you can see the file permissions (viewer only, no editing allowed). First of all this obviously means that the label works correctly, and second, Edge supports opening labeled encrypted PDF files.

Now, what if you want to open a labeled file but you don’t have an application that supports this? This is where the Information Protection viewer comes into play! As you can see above, it supports opening labeled and encrypted PDF files, amongst other file types like so-called .pfiles like .ppng, .ptxt and .pxml for example! For the complete list, take a look at this Microsoft support article.
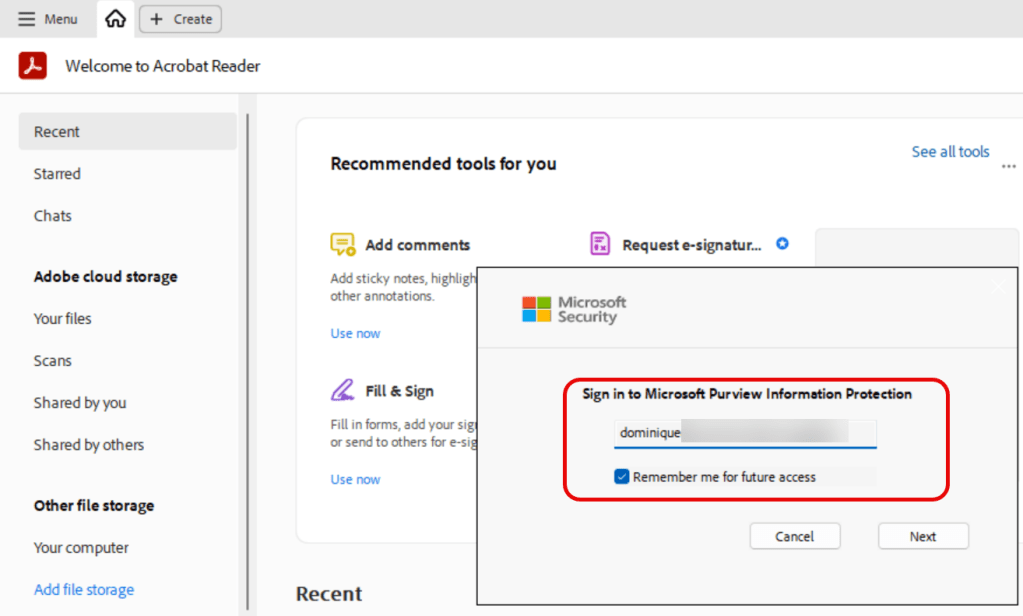
Since we’re talking PDF, let’s talk Adobe Acrobat Reader. Acrobat Reader has Microsoft Purview Information Protection support built right in. So after opening a protected PDF file, signing in with your Microsoft account and giving the Adobe Acrobat Reader application the necessary permissions in Entra ID you can view your file and even check which level of access you have.
Common error messages

A common error message that can be expected when you don’t have the correct permissions to open a protected file is the one above. Since this is a relatively generic error that states that you don’t have an account in the tenant where the protected document was created a user might be confused why the document cannot be opened. Let’s investigate what’s going on here:
- A document was created.
- A sensitivity label that also applied encryption was added to the document.
- The document was sent to a user in another tenant.
- The application that’s used to open the document contacts the Information Rights Management (IRM, also called Azure Information Protection, or AIP) service in the source tenant where the document was labeled / protected (encrypted if you will) to check if the user that’s opening the file has permissions to open (decrypt) the file.
- It reaches the IRM service, which states that the user doesn’t even exist in the source tenant, so can’t have permissions to open the document. Unfortunately, the latter isn’t specified in the error message.

The above error is more meaningful, stating that the signed in account doesn’t have permission to open this document.

In Microsoft Teams, the sensitivity labels of files are presented in the viewer, except for protected PDF files. When opening a document, the preview pane shows that the file has to be downloaded or opened in the browser.

Lastly, note that at the time of writing this article there are some known issues with encrypted / protected files in Office Online.
There you have it, I hope you learned something new today! In the next article, we’ll take a look at the Information Protection Scanner and PowerShell module capabilities of the client.
