Introduction
Before you can make use of all features in Microsoft Purview, such as information protection and data loss prevention, it is essential to understand which information is sensitive for your organization and where this information is located within your organization. Identifying this sensitive information can be done in two ways: through (auto-)labeling or continuous classification based on document content characteristics.
When is classification information collected and where is it stored?

Let’s take a look at the image above by Enrique Saggese. Classification information is created or updated when 1 of the following actions happen to content:
- Content is created
- Content is uploaded
- Content is modified
- Content is shared (only according to Enrique Saggese, not according to Microsoft Learn).
When one of these actions take place, content is ‘crawled’ and information about the relation between a classification definition (for example, a SIT, fingerprint or exact data match rule) and the document is added to or modified in the SIT index.
Information on the SIT index can then be used by the following Purview features for example:
- Content Explorer or Activity Explorer for insights
- As a source for applying sensitivity or retention labels based on classification information (for example: when a document holds a credit card number, apply retention label X)
- As a source for eDiscovery, search or data subject requests.
- Document control via Data Loss Prevention
Do note that these are only a few examples.
Label information is always added to the metadata of the file but beware, this is optional. So while the classification process always takes place and stores it’s information in the SIT index, labeling is optional and labels are only applied by human interaction, when information matches an auto-labeling policy or when information inherits a label from -for example- it’s SharePoint document library.
How do I update the SIT index for stale information?
Imagine the following scenario:
- You manage a large Microsoft 365 environment
- On a certain point in time, you make changes to your classification rules. For example, you introduce new Sensitive Information Types to better match your business requirements.
All of your active information that’s regularly accessed is updated. However, stale information that’s never uploaded or modified (or shared) again still holds a relation with old classifiers in the index. This is becoming more of a problem in this age of generative AI (Copilot in this case).
How would we update this relation in the SIT index? This is where on-demand classification comes into play which is a new feature in Microsoft Purview. First, let’s take a look at the prerequisites.
Prerequisites
- Membership of the compliance administrator role group to run the scan.
- To view classification results, you need to be a member of the Content Explorer Content Viewer or Content Explorer List viewer role group(s), just like in other Purview modules.
- On-demand is a Pay-As-You-Go (PAYG) feature, so a Azure Subscription must be linked to your Purview environment.
Configuration
Now, let’s take a look at how this works.

First, let’s navigate to Information Protection, Classifiers, On-demand classification and select ‘New Scan’.
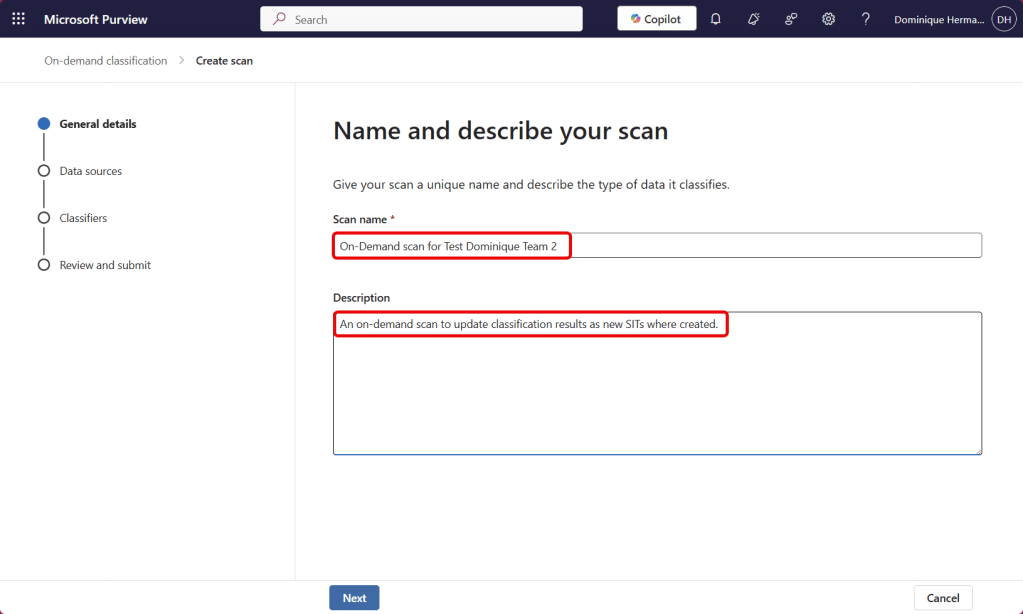
Enter a name and description for your scan.
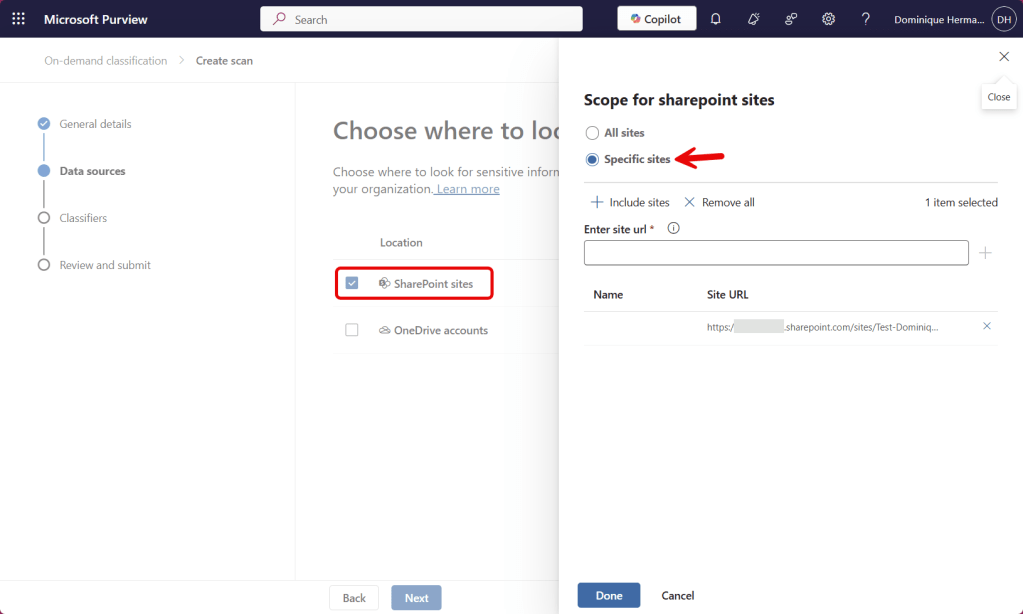
Select SharePoint sites or OneDrive accounts to be included in your on-demand scan. You can choose to include all sites and optionally exclude a few or do it the other way around and include only the ones you like. In my example I go for the latter and manually insert the SharePoint site I would like to re-scan. Note that not all sites can be selected from the ‘include sites’ menu.
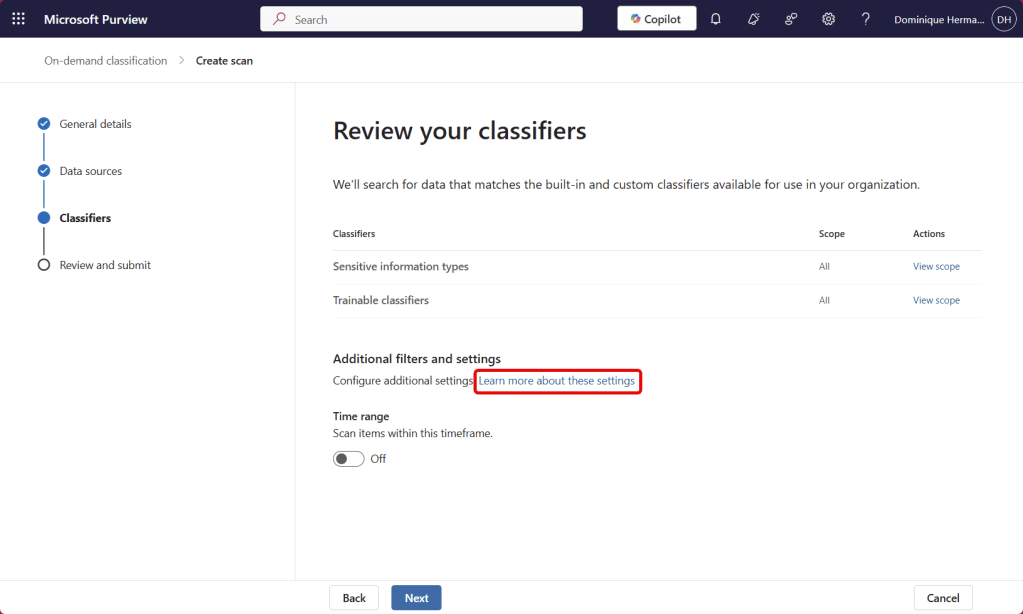
By default, the on-demand classification will look for all Sensitive Information Types and Trainable classifiers in your tenant. If you would want to narrow the scope, you can optionally select ‘View scope’. Additionally, you can choose to include only items that have been created or modified within a certain time range. The ‘additional filters and settings’ is a bit of a mystery to me, as on the linked Learn page, there are no additional settings described that can be configured.

Double-check your configured settings and press Submit.
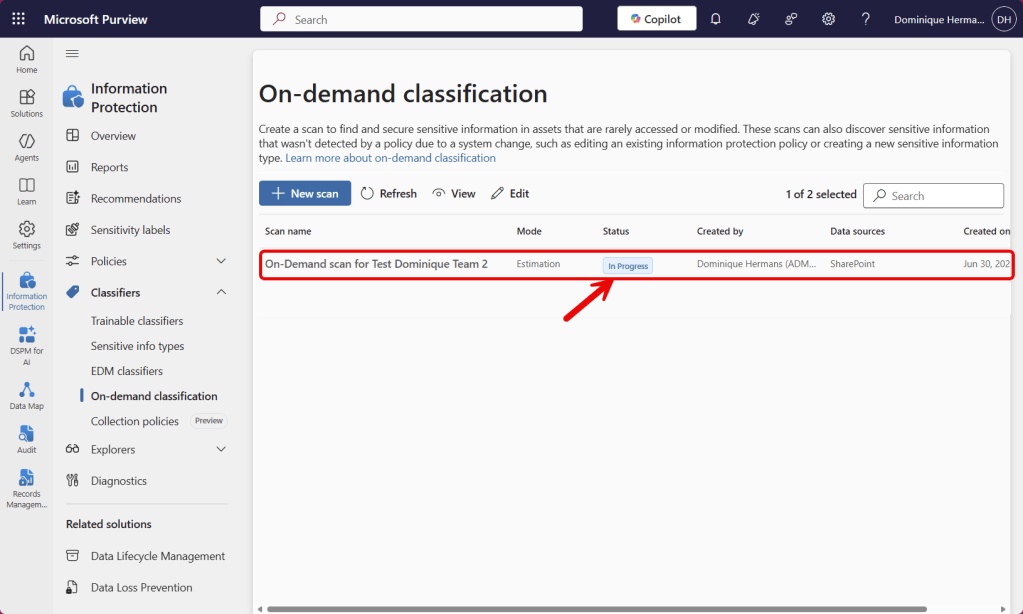
Now the ‘estimation’ mode starts. In this phase, on-demand classification will take a look at the included SharePoint sites and OneDrive accounts and provide you with an estimate of costs that will be incurred for classification of your resources. Click the scan and choose ‘View estimation’.

Here we can see that estimation is complete, the current scan status, items found and estimated cost. This is also broken down into each location you selected during your scan.
Now when the estimation is ready and you want to start classification, press the ‘start classification’ button.

Now Step 2 changes into ‘In Progress’ while the system is classifying your files. During this stage, the following happens:
- The contents of the files in the configured locations are scanned and matched against the classifiers you selected.
- The SIT index is updated with the information from your on-demand scan.
- Once on-demand classification is done, Data Loss Prevention (DLP), Information Protection (MIP), Data Lifecycle Management (DLM) and Insider Risk Management (IRM) policies are re-evaluated.
- Note 1: It will take up to seven days for Data Explorer to show the newly classified content.
- Note 2: Classification can be started up to 30 days after the estimation phase. However, make sure to minimize the gap to minimize the risk of inaccurate estimated cost that has been created in the estimation phase.
- Each scan can process up to 1000 location and 5 million files.
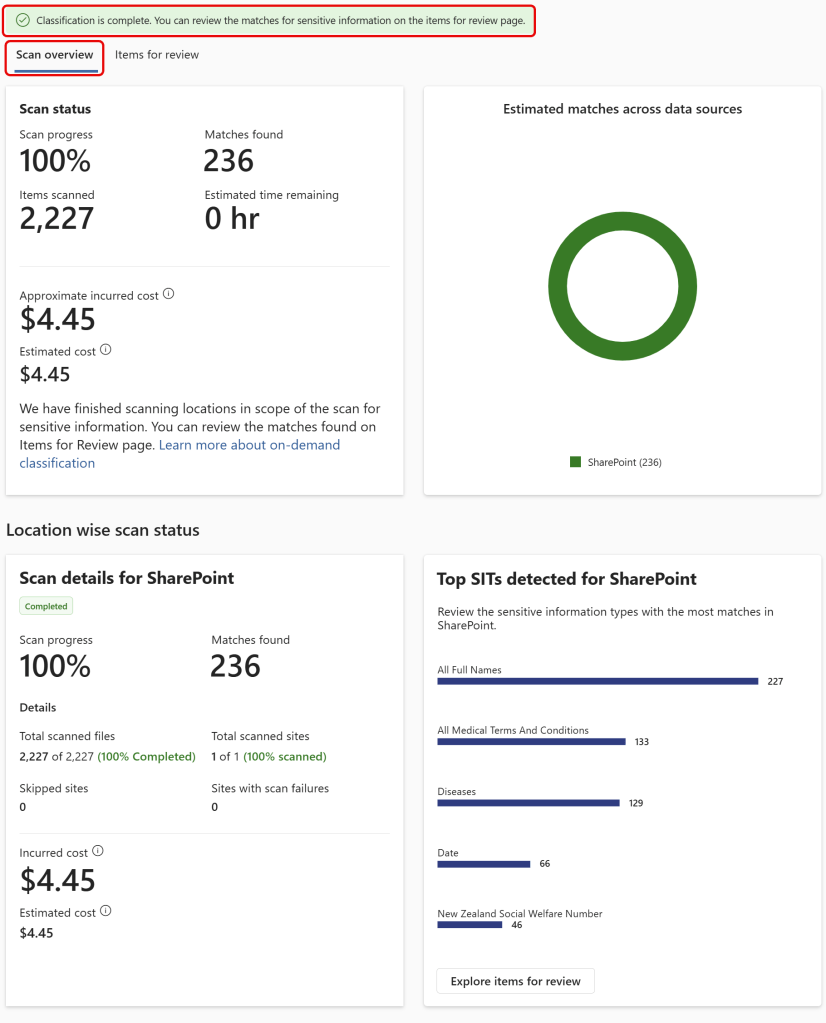
As you can see when classification has finished, the estimated cost was spot-on. Keep in mind that this is a simple test environment and your mileage may vary. We can also see scan details per location and the top SITs and sites detected.
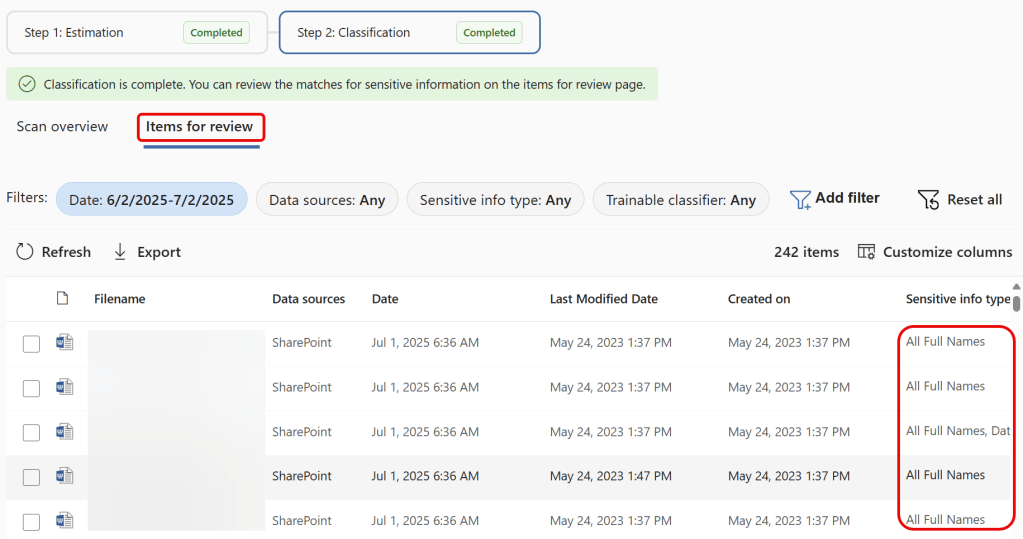
When clicking ‘items for review’ you can take a look at the items that were processed by the on-demand classification engine. If you are a member of the Content Explorer Content Viewer role group you can also take a look at the content of the files and view more information on the sensitive info types found like confidence-levels, count and other data.
Something I noticed while testing this feature is that when you have recently uploaded files scanned in a new SharePoint site, they are not always detected. So please keep that in mind. Of course, this is not a scenario that will occur frequently, as on-demand classification was introduced to scan stale data. New data will be classified through the regular process (upon upload or creation).
Wrapping up
I think the on-demand classification option is a great way to make sure classification on stale items is up-to-date. Especially in this age of M365 Copilot you want your classification to be up-to-date to make sure Copilot will only use the information you have chosen, based on certain labels or classification in your environment. Despite being a metered service using the Pay-As-You-Go (PAYG) model, it’s great that the service is transparent about the costs upfront, before the on-demand classification process begins.
